Narran Park
01:38:55 
What is a reasonable sale price for this wild? -HEE Click-
SCF Sporting Chance
01:14:59 SCF/Gibbs
dead
*Rising Stars TBs*
01:05:21 Star / Sarah
Bri, I have to say this: I love your art! It is so beautiful! And what app do you use?
Wyllow Creek
12:57:19 Bri
Thank you <33
I only wish she didn't have Sabino haha.
NS Arabians
12:54:11 Koko
Ooo Congrats Bri!
Wyllow Creek
12:49:28 Bri
First bred EWW :O
And from the mare I captured during the party woo
-HEE Click-
Black Meadow Estate
12:26:05 
-HEE Click-
Thoughts on this
Boulder Creek
12:24:15 
My dog was taught to pick stuff off the floor like keys. I put a bobble keychain on it so she could easily pick them up.
She also would bring the mail from the mailbox into the house.
She loved the small jobs.
When she was younger, she could also spend two hours running in the dog park or the backyard.

It made her feel useful, it made her calmer in the house, and easier in public.
She loved meeting new people, especially kids, and she was a BIG dog, so she was taught she had to lay down to meet someone new, and then she would present her belly for rubs (one of her absolute favorite things).
It made her think and respond accordingly to people.

She wasn't the most mannered dog - still would bark at the door and if she knew the person would jump on them and lick their ears.

Not all dogs are perfect but
Boulder Creek
12:19:23 
Sorry for the whole rambling rant - training and behavior are a HUGE passion for me.

There are great clicker training podcasts. My favorite is Equine Clicker 101, as it gives a step by step guide to the session and also what to do for troubleshooting situations.

There's a few people who are on the Video Social Media who give training tips and ideas for keeping an energetic dog.
Like small things you can do is make meal time interesting and a challenge - scattering kibble in a towel and rolling it up, or in a ball, or a frozen peanut butter Kong.
Anything that makes them take longer to eat and have to use their brain.

Something mentally challenging is almost as energy depleting as something physically challenging.

Having a job can also promote self confidence in a dog.
Something simple like bringing you the re
Evermore Estate
12:13:47 Oriyana
Strut you want mares strong in M and I. St wouldnÂ’t hurt either
Boulder Creek
12:11:19 
Training a service dog was one of the most rewarding experiences I've had.
She loved having a job - from being a mobility guide, anxiety helper, and even household chores like putting dishes in the sink, garbage and recycling, and putting laundry in the basket.

Training is one of those things that is always happening - every time you interact with anyone, you are teaching them how to interact with you.
If you let a horse or dog take up your space, they will then you think that that's an okay behavior.
Sometimes sessions are about fun things like crawl and roll over, sometimes it's experiencing a new environment and relaxing, and other times it's going back to basics.
Have fun - do dog things
Work on manners - in th house
Work on tasks
You can't demand perfection all the time, they should be allowed to be an animal, but make it interesting and fun to do different things all the time. Even if it's something small.
3S Cast n Characters
12:01:05 Kitty
The only thing my dog retained in training, is good girl spot and finish, means pee and poo. hahaha other things because of being a Chihuahua mix and selective do and hearing
Broadaxe Ranch
11:59:49 Strut
-HEE Click-


like what am i supposed to look for
Broadaxe Ranch
11:59:32 Strut
ok i have a question.

to get a better rating what should i breed this guy to??
Backwoods Beauties
11:50:49 Sway
Yep I trained my dogs myself🙂 not much to say with Minga lol cause she tries to murk people and ity her jumps sometimes, but my rescue Shiya and my dog Ive had since I was 10(LiLi) I both trained. LiLi and I did 4H dog club, and got BIS at the show:)
Hummingbird Meadows
11:45:51 Hummer
@Lucky, I just need to find the time and energy! 😉
Snitches' Stitches
11:35:10 Stitch
Going new places can also be a good workout. We take our pit mix out to new hiking areas whenever we can and all of the new things really help to wear him down.
Lucky Ranch
11:34:47 lucky
I bet you could teach him yourself
as long as they have decent drive its pretty easy to teach dogs to do a job
Hummingbird Meadows
11:28:55 Hummer
Yeah, I should probably look into teaching him some more things. We used to go to dog-friendly stores to train and I still take him to them, but he is familiar with it.
Sunstone Elite
11:26:56 Sun/Sunny
-HEE Click- What a pretty colt *_*
You must be a registered member for more
than 1 day before you can use our chatbox.

Rules   Hide
You are in: Main Chat
View Sales


 Year: 177   Season: Fall   $: 0 Sat 01:41am CDT  
 Forecast: Moderate Temperatures and Overcast


Forums

→ Horse Eden is a fun game! Sign Up Now!

My Subscriptions
My Bookmarks
My Topics
Latest Topics
Following
Forums > Art Shops > Art Help
  1

Tangles Greyscale Guide | WIP November 30, 2020 01:43 AM

Tanglewood
 
Posts: 10108
#814579
Give Award

Tangle's Greyscale Guide!

Finally saved work-in-progress images of a recent art piece, so here you go! This guide will essentially teach you how to colour and shade a lineart - there is another patterns guide coming up ;)

NOTE: This greyscale may NOT be used by anyone other than me. As these are WIP images, my watermark isn't on them, so I'm trusting the HEE community not to steal it :)

Step 1:
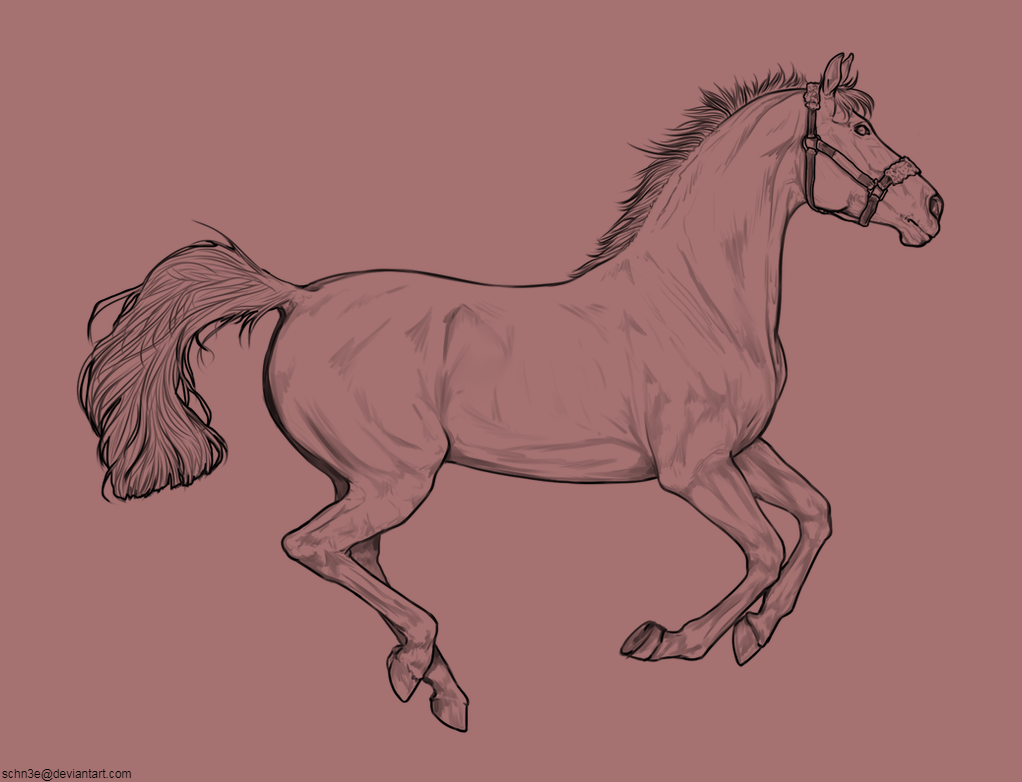
Load your lineart onto your desired program and pick the background colour. White is very good at hiding any mistakes or weird lighting, so I prefer working on a grey-pink colour. This is your personal choice though, since you'll change it at the end.

Step 2:
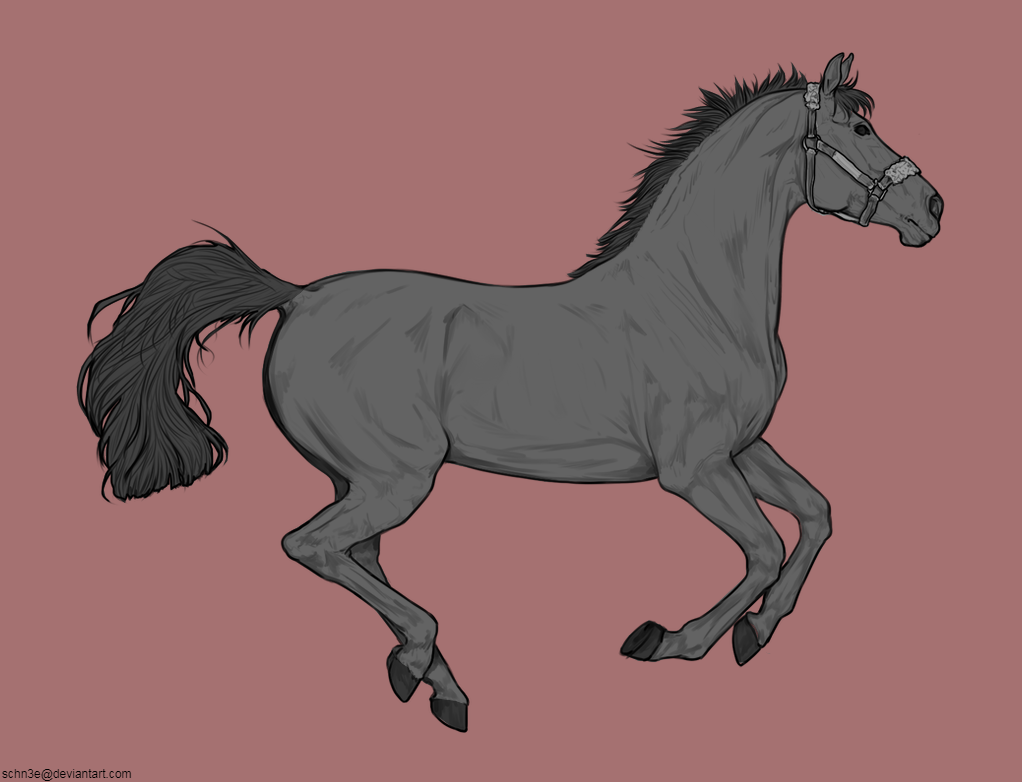
Colour in your areas. You'll want different layers for each area - one for the base, one for the mane + tail, etc. I like using the polygon lasso tool for this part, as you can nip around the edges very quickly and know that there aren't any colour spills. Use layers to yuor advantage as well - put your mane layer underneath the base layer, since then you can lasso less specifically on the side that connects to the horse.

Step 3:
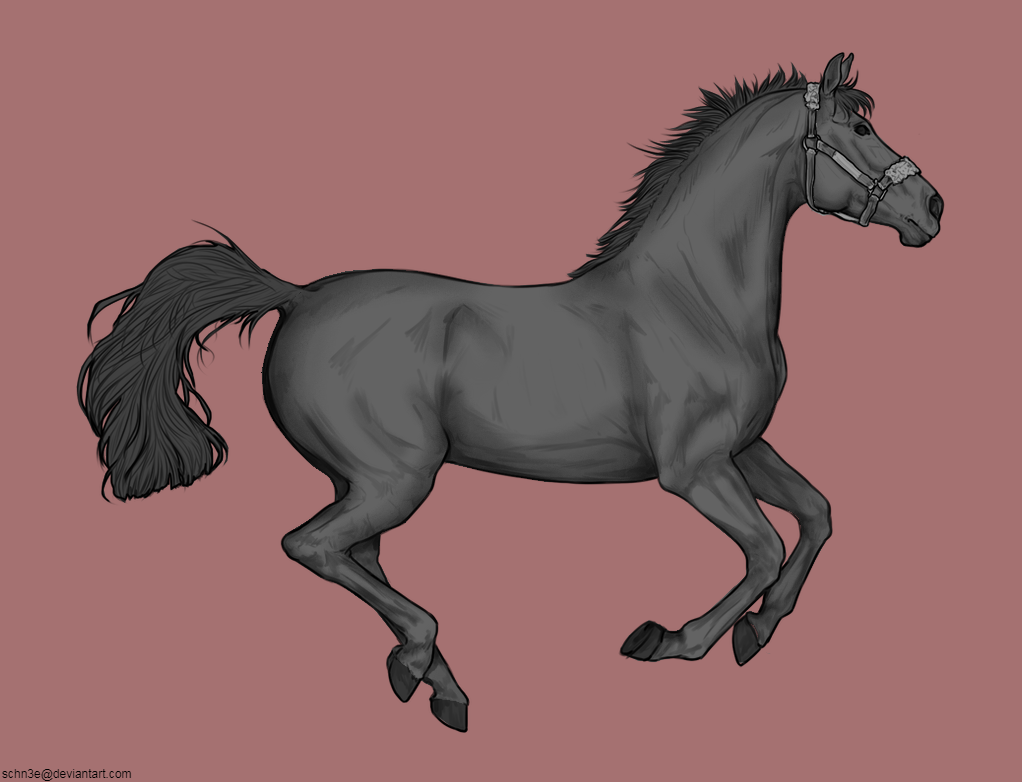
Now to the trickier part: shading. Begin with a weak burn brush (darken) and gently follow the natural curves and shadows of the horse. I like starting by the belly, then the mane shadow and neck shadow, and then the rump. Even if the place isn't hugely dark, you'll still want to shade it to give the lineart a 3D look (The rump/bum as an example). Go over some places multiple times to create a darker shadow, but don't shade everywhere with the same amount of darkness. The point right below the cheek will be darker than the point almost at the middle of the neck, so don't make both equally dark. It may take a while to get used to which places need more/less shadow and where to start, but practice helps a lot! (Surprise surprise...)

Once you've shaded the larger, more general areas, start on the details. (E.g. the cheekbone, muscling on the legs, bones.) When you're starting out, it definitely helps to have a lineart such as the one I'm using for this guide, which already has some muscling guides.

TIP: Following the natural bone structure gives you a simple guideline on some smaller details. Make sure not to ignore it!

Step 4:

Lighting time! If you're not 100% sure of this stage, I suggest duplicating your horse layer and keeping a pre-lighting one in case you aren't happy with the result. (That way, you can simply delete your used layer and restart on the clean one without having to press undo a kazillion times xD)

As a very rough rule of thumb, try to follow the areas that are essentially the 'reverse' of your dark patches. E.g. you darkened the edges of the cheek, therefore you should lighten the middle of the cheek. This adds nice depth to the image, giving it more of a 3D appearance. As before, start on your larger, more general areas - middle of the neck, ribcage - and move onto your smaller details after that (cheekbone, facial details, small muscling on the legs) You'll want to keep in mind the natural muscling of a horse, so it's always nice to have a horse anatomy image to check.

Remember to be aware that places that fall partially in shadow still need muscling. I often forget to lighten the hind leg that's further away - as it falls in the shadow of the closer one - so keep in mind of your common forgetful spots.

TIP: If you're going to load your completed lineart onto an image that has strong lighting, I suggest you leave this step out until you've added the background :)

Step Five:
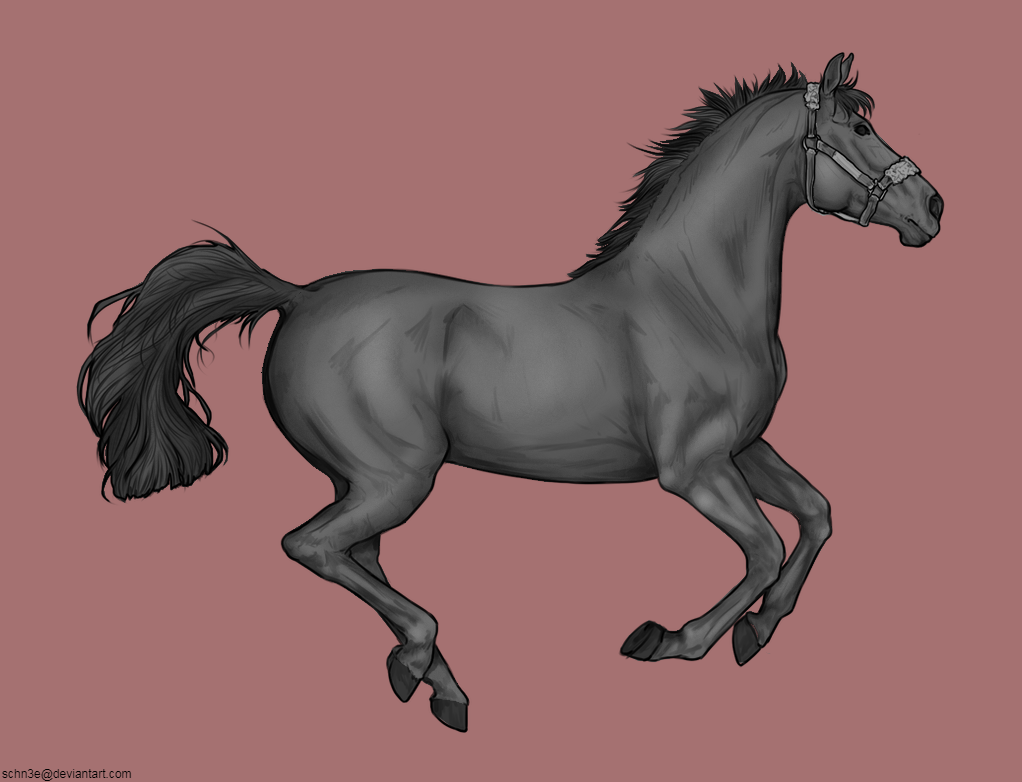
Now onto the mane and tail - I forgot to record the individual lightening/darkening steps, sorry about that. But I can still explain the basics wip

Step Six:
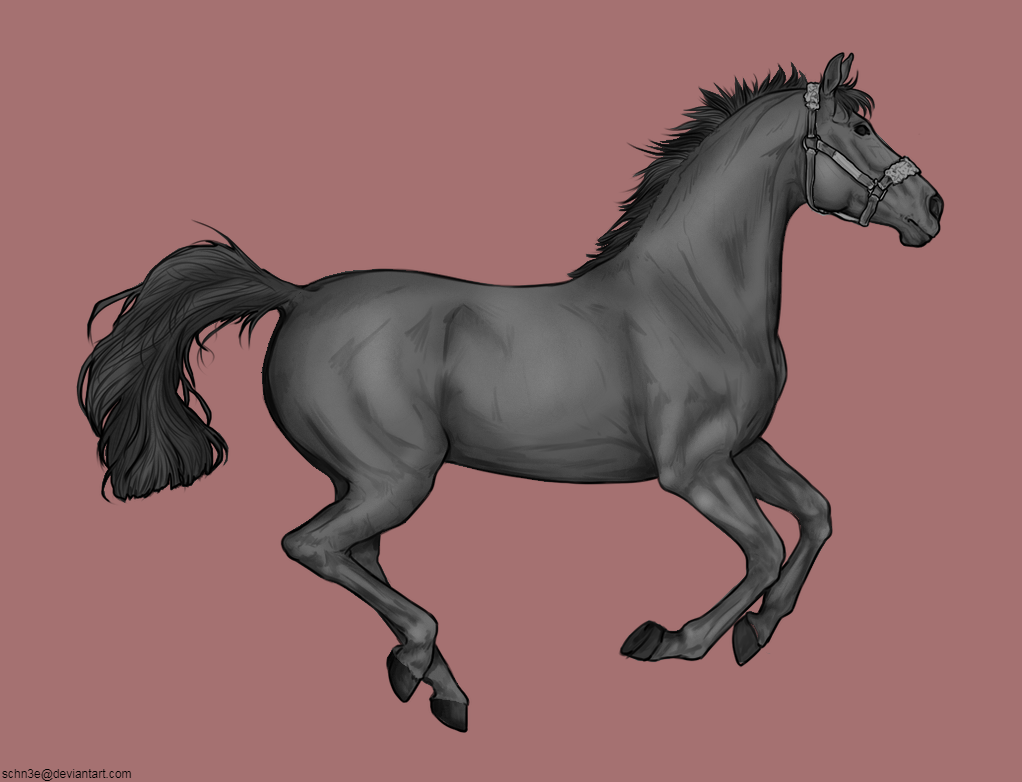
Step Seven:
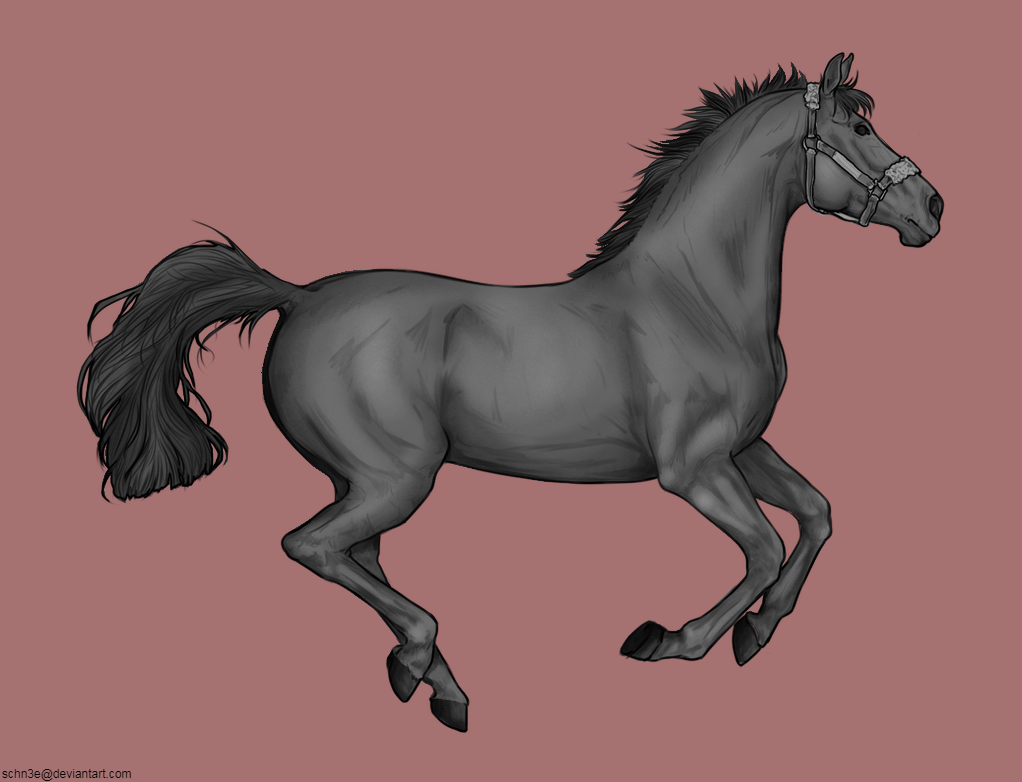
Step Eight:
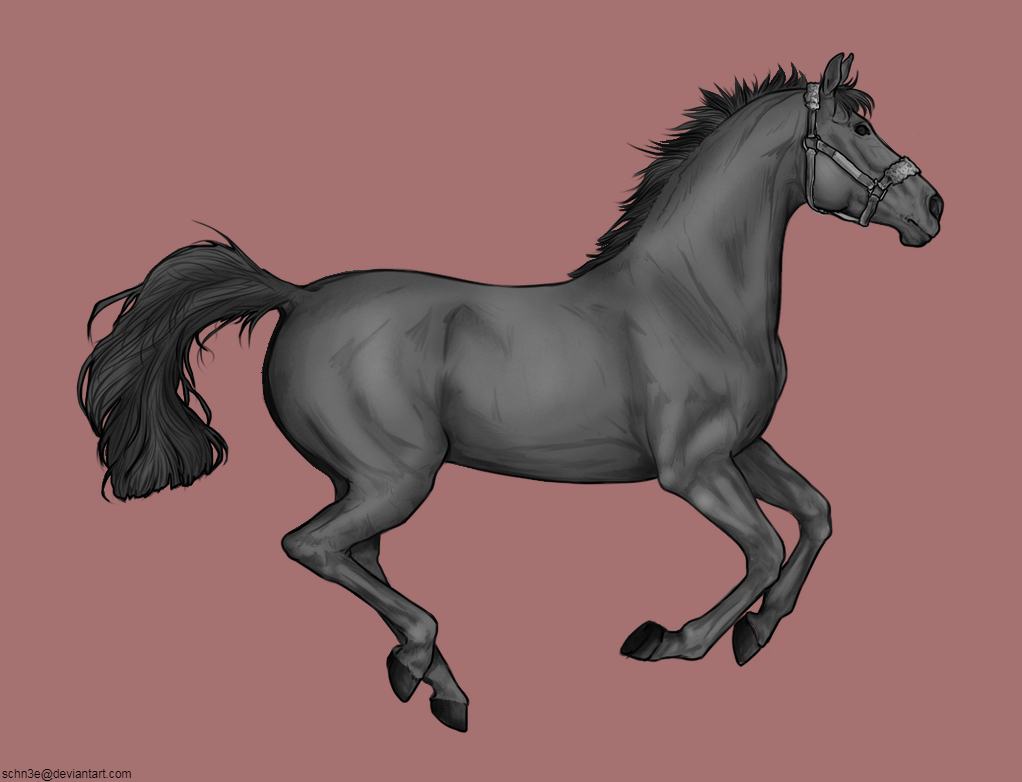

Edited at January 21, 2021 04:10 AM by Tanglewood

Forums > Art Shops > Art Help
  1

Refresh


Copyright ©2009-2024 Go Go Gatsby Designs, LLC    All Rights Reserved

Terms Of Use  |   Privacy Policy   DMCA   |   Contact Us
Help Me (0)  |   Game Rules   |  Reset Palette