| |

|
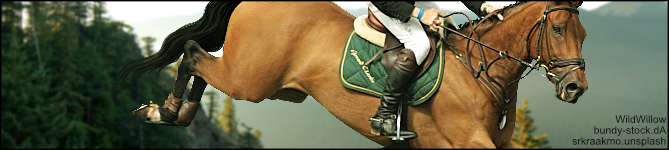
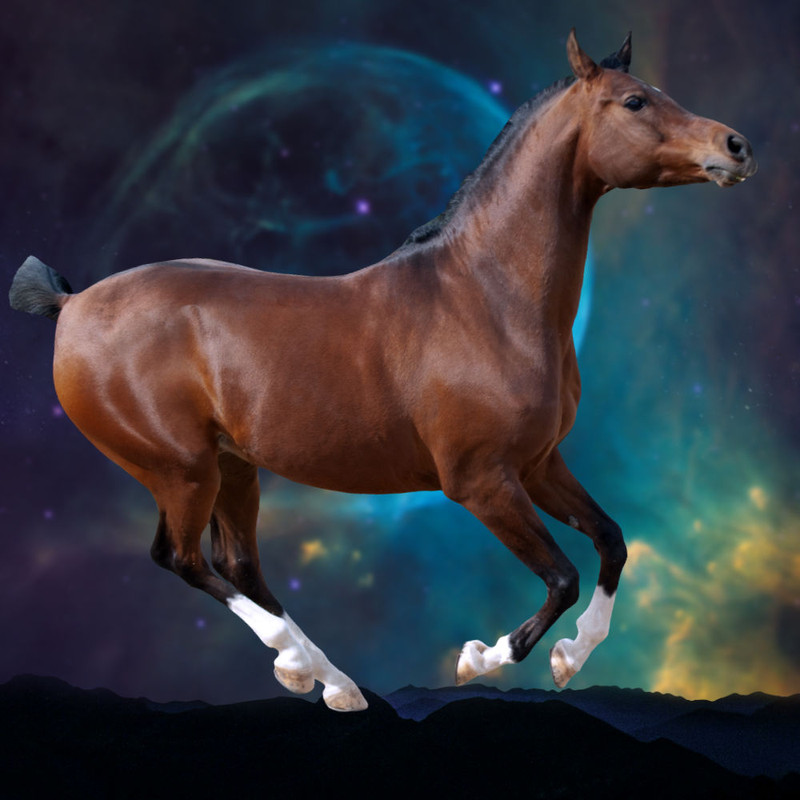
Welcome to Willow’s Art Tutorial I’ll be going over most of the main aspects of art. I will not be touching on choosing stock or background - this is focusing purely on the horse details + mane/tail. The piece I’ll be using as my demonstration is a personal piece for my WWW filly. I chose to do this piece for the tutorial as it is intense and high contrast. I encourage people beginning to do art or working on their skills to start out with high contrast pieces. When I critique natural pieces from new artists, the weak points are always really strong shadows/highlights and getting the horse to “fit” into their surroundings. This is because these things need to be subtle and so carefully done on natural pieces. With high contrast, the work is a bit more abstract which allows you to work on more freely without worrying about being really subtle in the colorations. My "equipment": MacBook Pro laptop & Affinity Photo program, no tablet |
|  |
|
| |
|
STEP ONE: Horse Prep At this stage, I have my background entirely ready for the horse to be inserted. The first step is to entirely cut the horse out. Use a hard brush for this - you don’t want any blurry edges. I typically use a 3px size. Take your time!!! Rushing only leads to a messy end result. 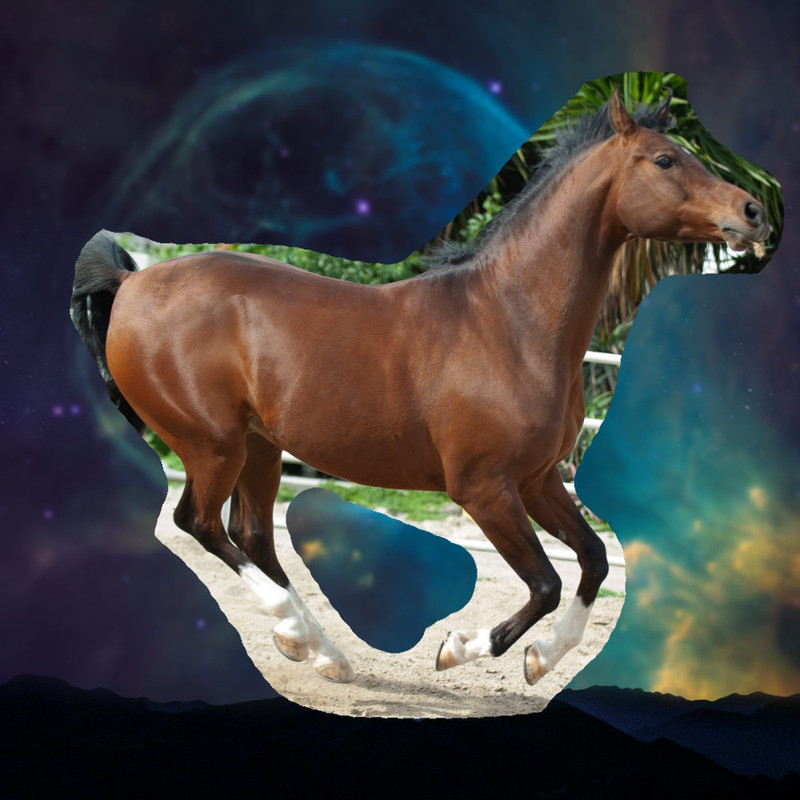
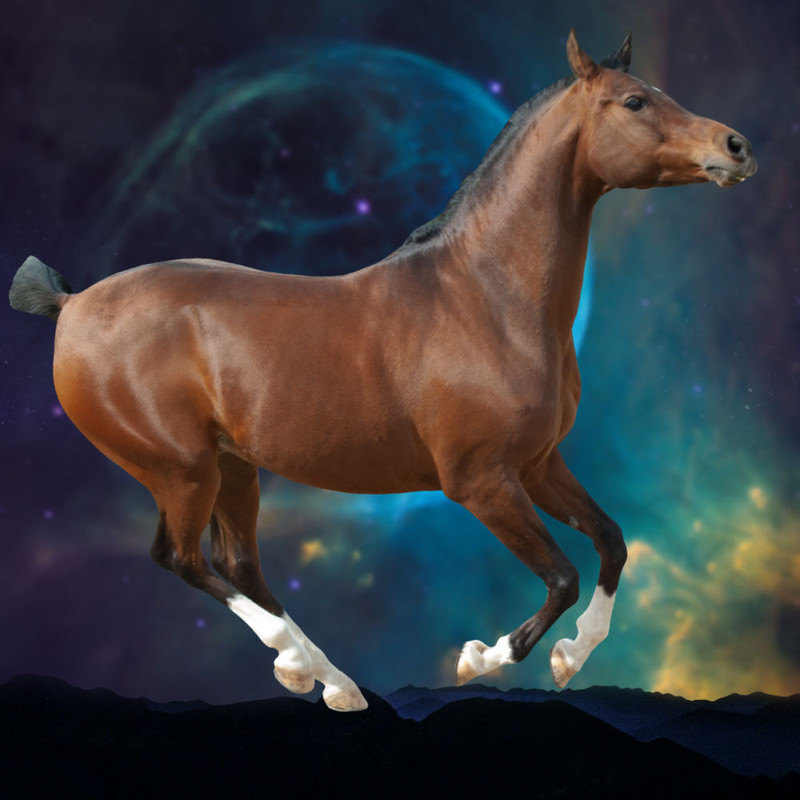
After the horse is entirely cut out, I play with the “auto settings”. Sometimes I use all four settings and sometimes I only use 1-2. Play around and see what looks right with the stock images. In this case, I used all four. You can see from comparing the before and after that it made the horse darker, higher in contrast, and more blue toned. 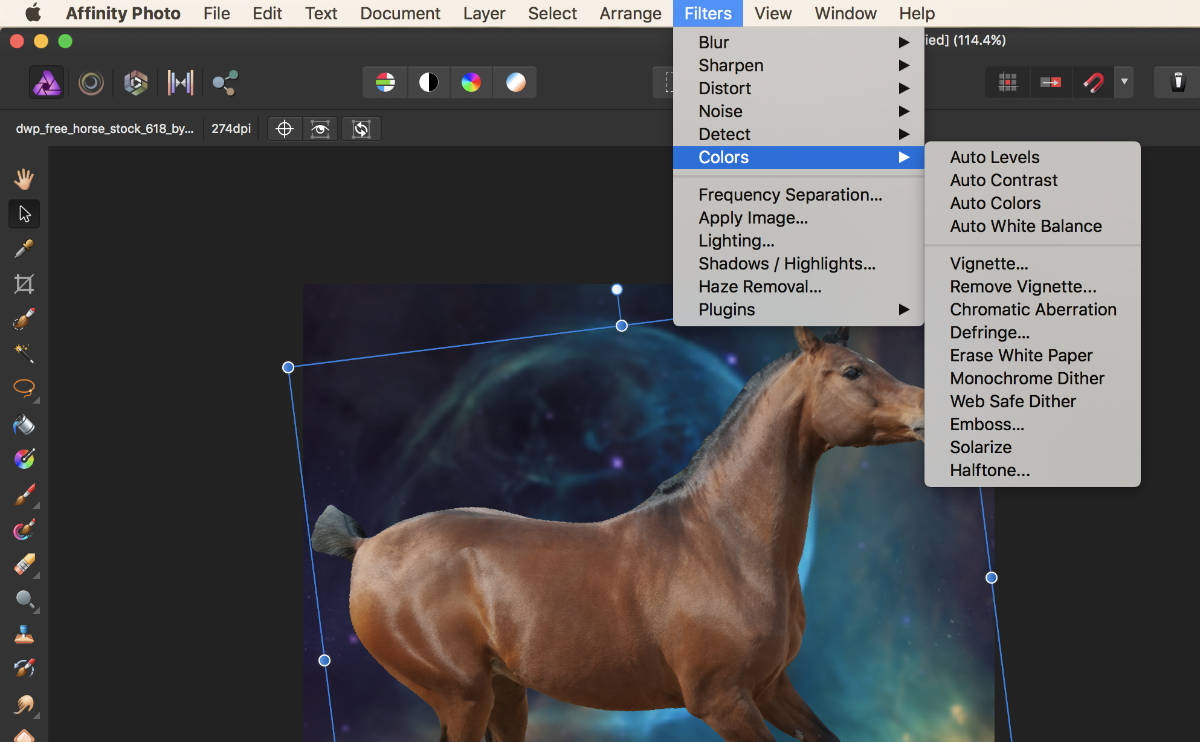
Next, I use the denoise tool to take out unnecessary details. This quite literally just gets rid of the “noise”. It creates a cleaner, smoother horse without heavily having to use the smudge tool. You can play around with the intensity of denoise to create your own style. :) 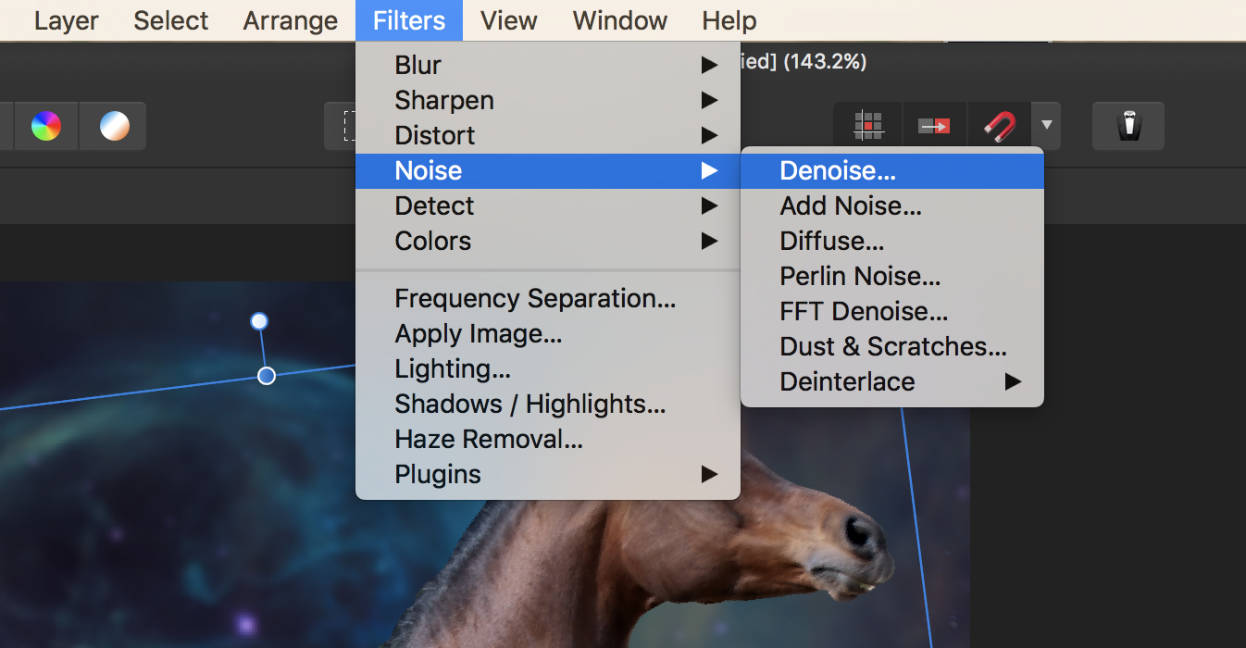

Once denoise-d, take a close look at your horse. If there are any rough imperfections, go through with a smudge tool on the settings of a very soft brush and super low intensity (~15%). On this image, I don’t see any rough imperfections but I do find a few spots I’d like to edit out. I’ve circled them in red; a few white dust spots on the legs and grass on the lip. I’ll use a clone tool to get rid of these. 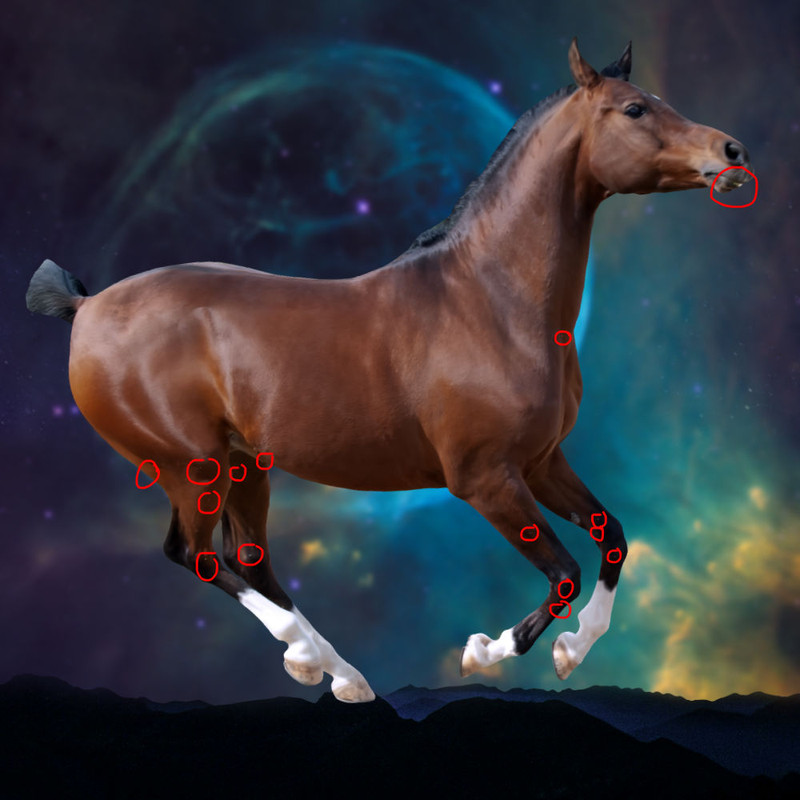
To get rid of the spots, I take a sample of the color close by that would look natural if applied to that spot. Using a very soft brush, I color over these bad spots. You wouldn’t think it would make a big difference but it does! After following these steps - you’re done for prepping your horse base! |
| |
|
| |
|
STEP TWO: Shadows This is one of the massive steps towards getting your horse to blend into its background! Note: On this step, I played with brightness/contrast/vibrance on my background until it was tweaked to a look that I like. With a soft brush, select a dark color. Do not go for straight black as when you play with opacity, it becomes more grey. Figure out what the dominant color of your piece is and adjust your black towards that color - for example, a very very very dark navy or a very very very dark red. In this piece, I’m using a super dark navy. Apply the shadow where light will not be hitting your horse - so on the legs, belly. I’ve highlighted this in red. Green is where I plan to place highlights, reflecting where the light source (in yellow) would fall. 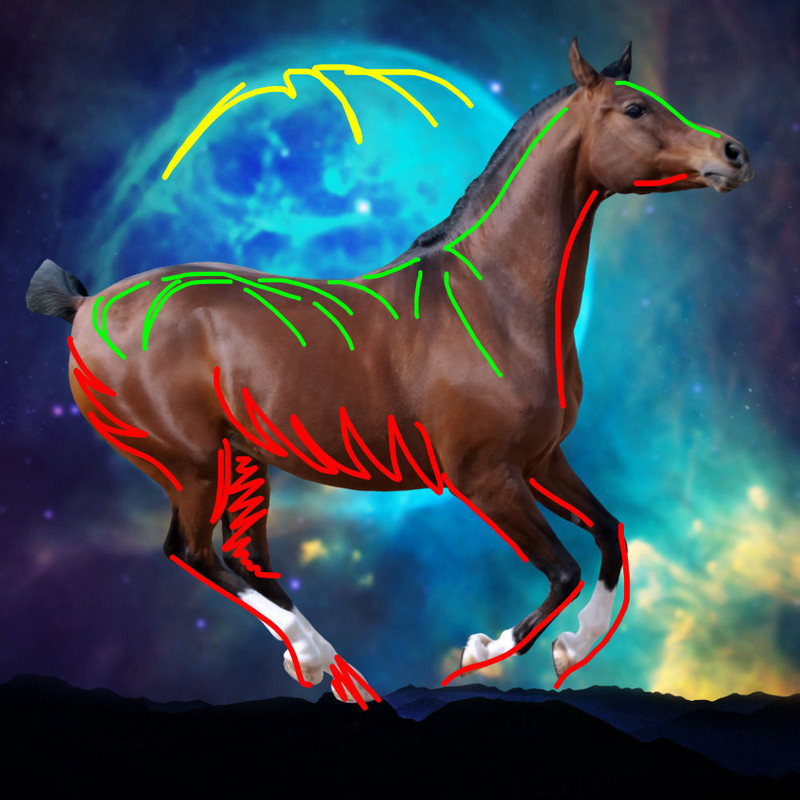
After knowing where I’m going to put shadows, I apply my dark navy color with a large, very soft brush. I change the setting of this layer to “Multiply”. 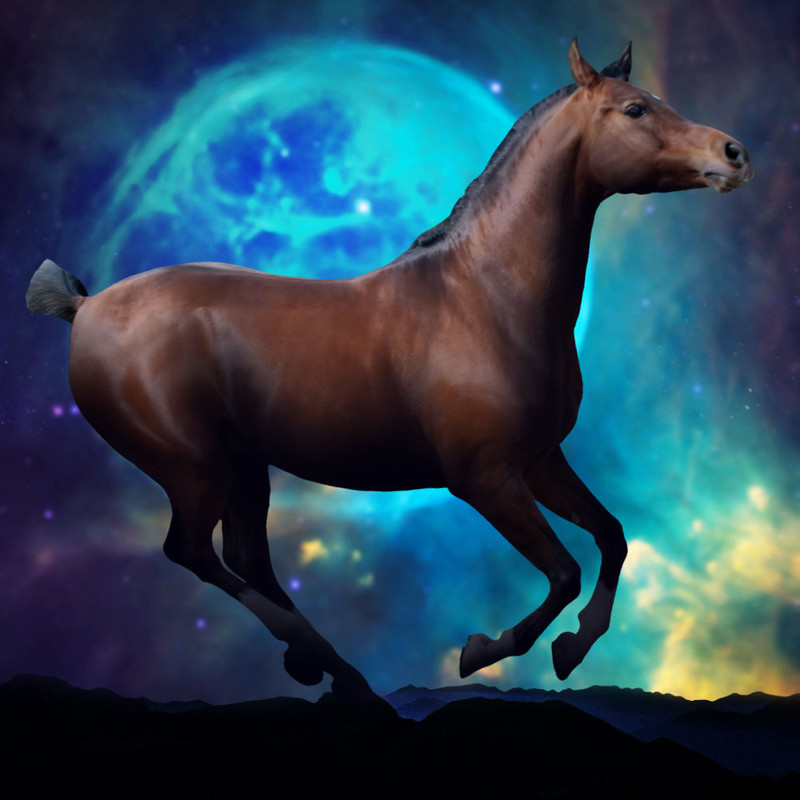
I then decrease the opacity of this shadow layer to 80%. This is because I don’t want the shadows higher up on the body to be equally intense as the lower shadows. On a new layer, I go in again and hit back up the spots where shadowing would be the darkest. I also change the setting of this layer to “Multiply”. 
Done! |
| |
|
| |
|
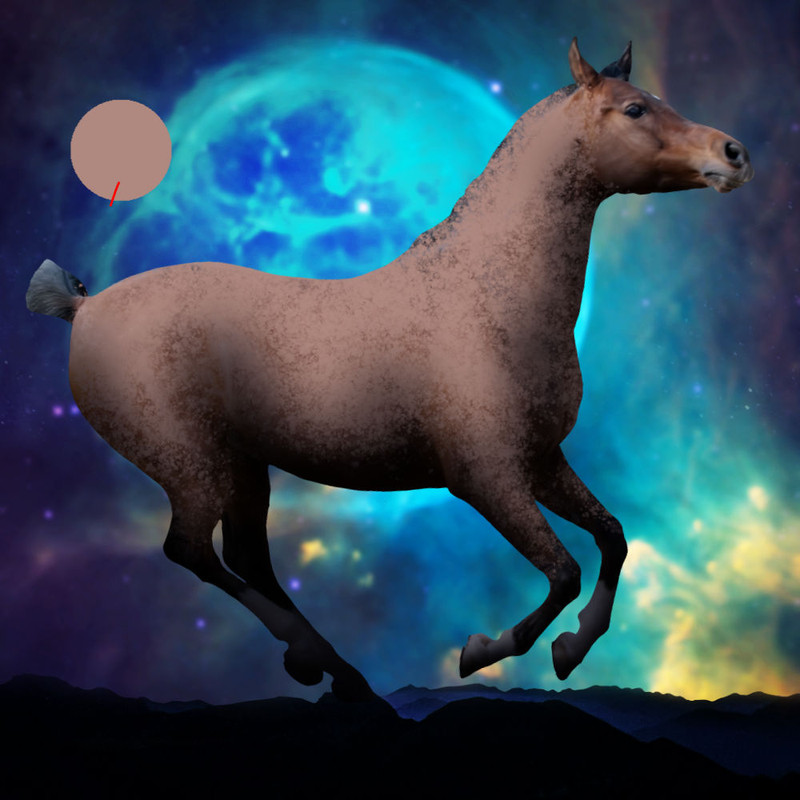
STEP THREE: Roan This horse is getting changed into a roan! I do this step before my highlight because the color of the horse does impact how light I make my highlight color. To do a roan, color change, or any other marking, put the layers for these things ***underneath*** the shadow layers. To do a roan, find the average light color on the top part of your horse’s body. For this specific horse, this color is: 
Next, find the brush you’ll use. In Affinity Photo (AP), they have premade textured brushes. I like to use the 300 “Grunge 2” brush under the category “Texture”. Use this brush with your light color and work with a medium-ish size, to create a roan-like look. Focus the color on the main body, going up the next and down the forelegs. If you’re doing a heavy roan, get a LOT of color on there. If not, be light. My filly is a heavy roan so that is what I will be doing. 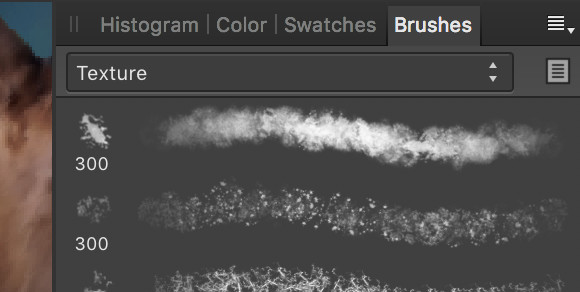
Now duplicate your roan layer so you have two. Hide the new layer and focus on the current one. Using a gaussian, play with the intensity until you get that smooth as butter roan look. On this piece, I did a 6px application. Now lower opacity until you feel it looks somewhat natural. I did 75%. You may also play with the layer settings - sometimes it looks best at Normal and sometimes Screen looks better. On this specific piece, I set this layer to “Add” as it brought out some of the natural highlights of the horse. 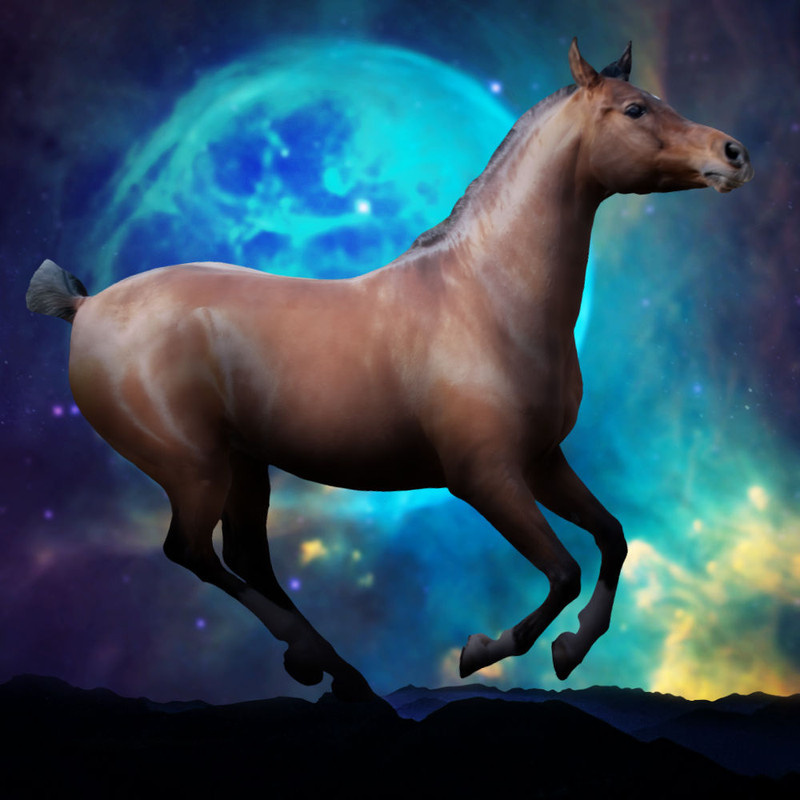
Now show your second raw roan layer and put it ON TOP of the other roan layer. Set this layer to screen, go back in with your textured brush but large and as an eraser. Add some extra texture by deleting part of this roan layer. Then lower the opacity of this layer. The purpose of this layer is to add a bit of texture back into your roan. Play with the opacities of both layers until you find a natural roan. I ended up at 50% for my original roan layer and 39% for the textured roan layer. 
Still doesn’t look quite right, does it? Go back in with a very large soft brush as an eraser and gently erase some of your roan in those shadowy areas. 
|
| |
|
| |
|
STEP FOUR: White Markings Using the freehand lasso tool, select the general area you’d like a white marking in. Make sure you are on the main horse layer when doing this. 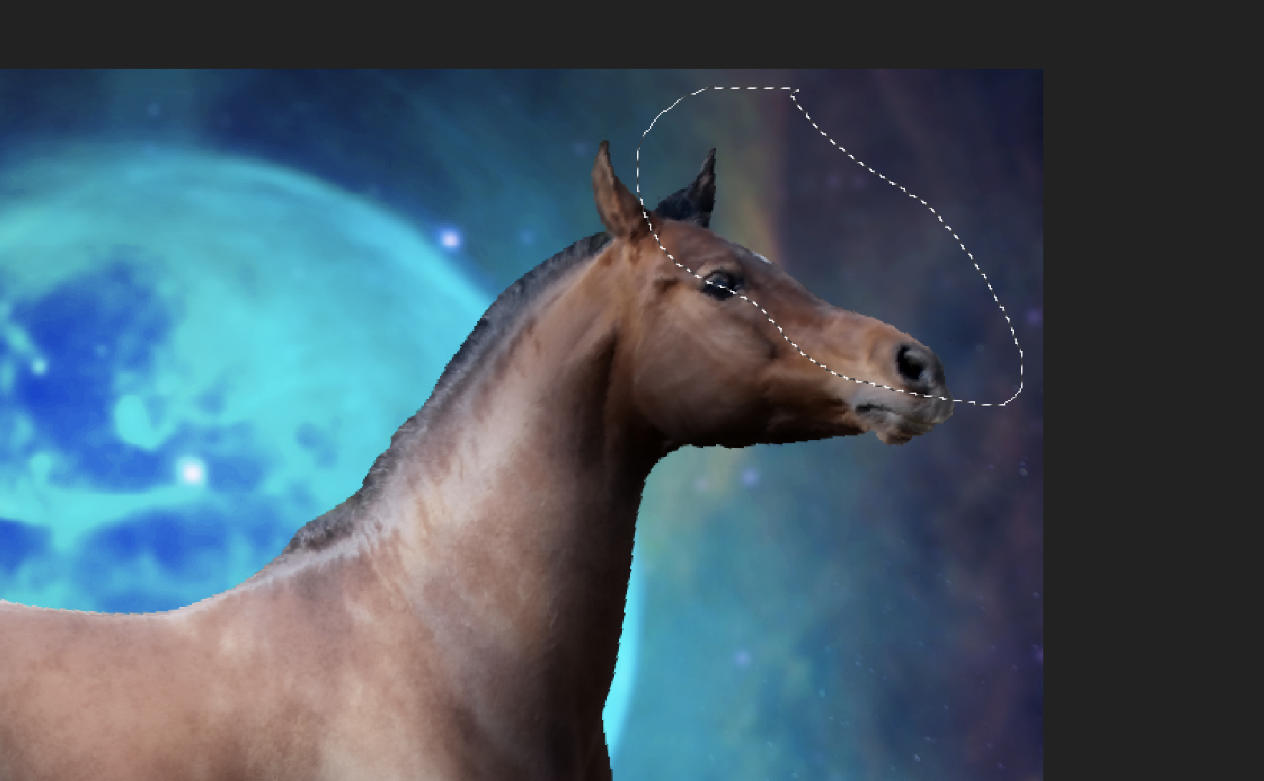
With a solid brush in white, color this entire area on a NEW layer. Place this layer underneath your shadow layers. Set this layer’s setting to “Color”. Lower opacity until you can see just a hint of the original color of the horse beneath - you just don’t want it straight up shades of grey. 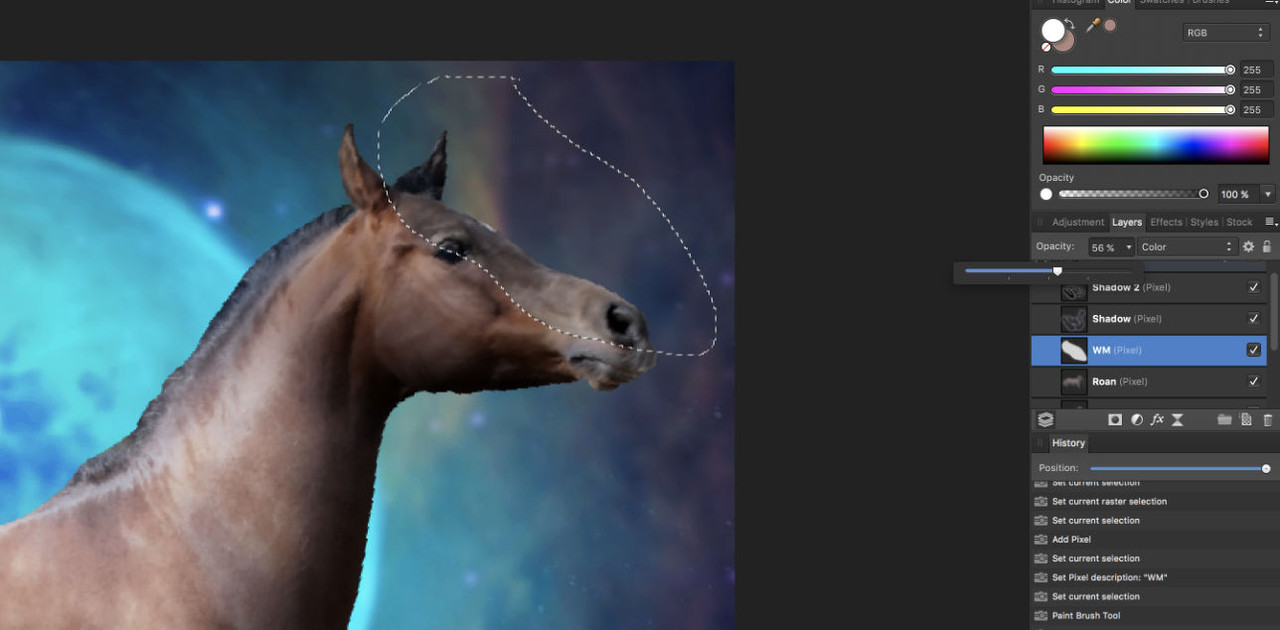
Now, find the HSL setting toggles. On AP, this is under “Adjustments”. You should see three sliders - one for Hue Shift, Saturation Shift, and Luminosity. Leave the first two alone. Slide the slider for Luminosity up until the area you have selected turns white while still being able to see some of the horse’s details beneath. Change this new HSL layer’s settings to “Screen.” 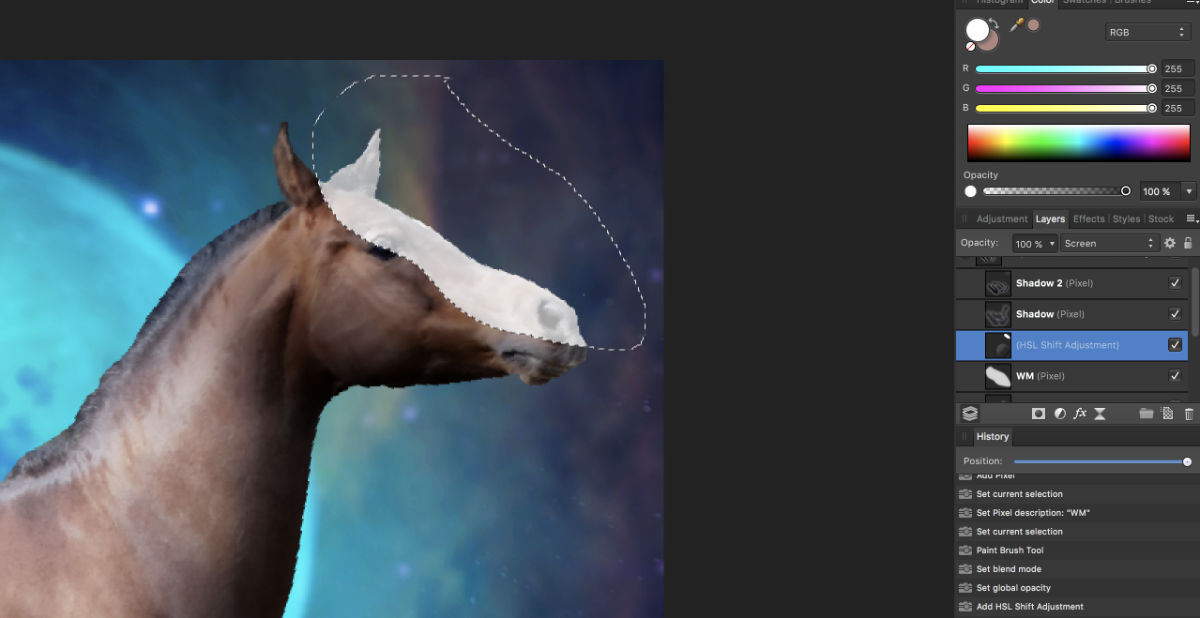
Now go back to the Adjustments tab and find “Curves”. It’ll give you a pop-up that looks something like a graph. Starting from the center drag up just a little bit - not a ton (dragging down will give you black). 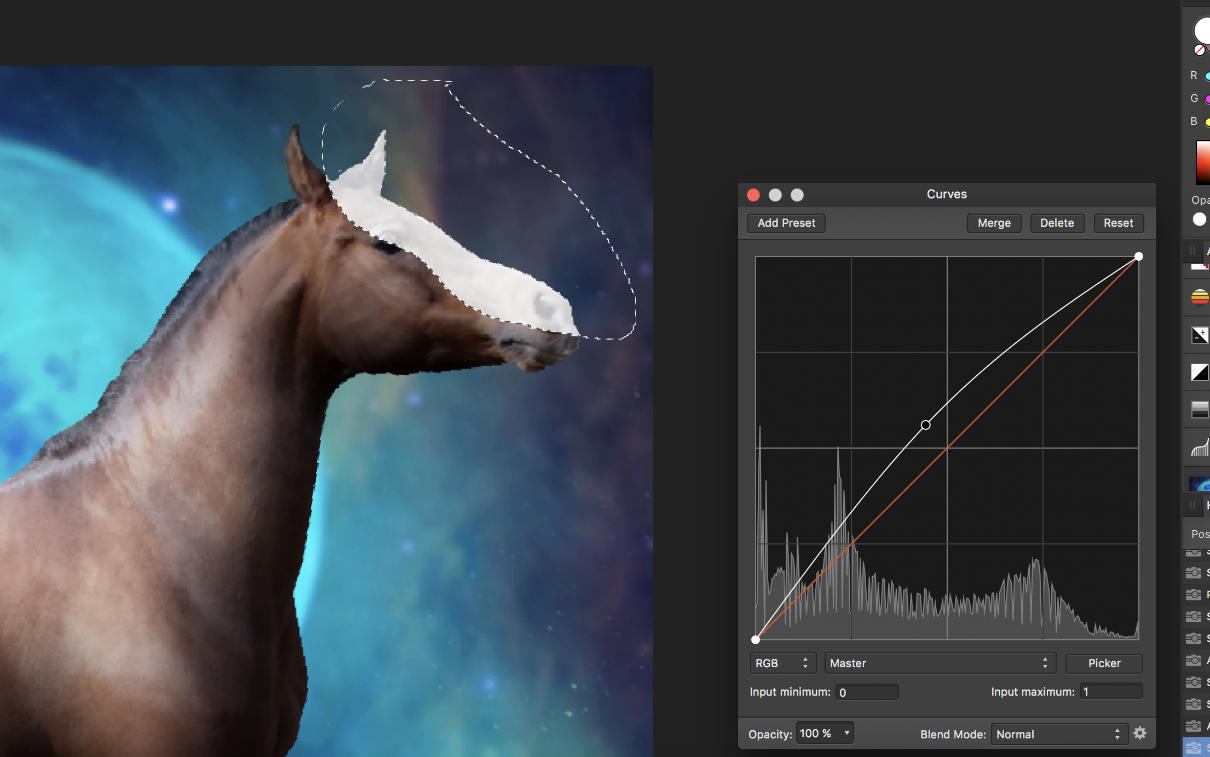
You now have the three layers that will make up your white marking - the original white you painted on, the HSL adjustment, and the Curves adjustment. Click deselect which will take away your lasso tool. Play with the opacity and layer settings until you have a white marking that you like. For this specific piece I had the following settings: OG white, 59% on Color setting / HSL, 86% on Screen setting / Curves, 46% on Screen setting 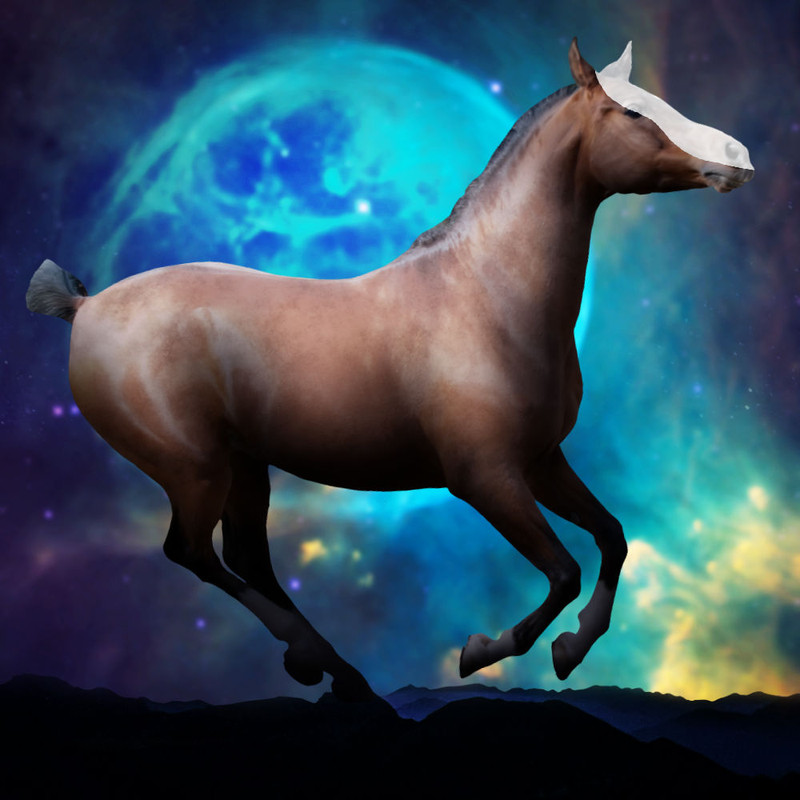
With this big blob of white, you can now begin sculpting your white marking. Select all three layers and with a very hard, small (about 3px) eraser, carve out the outline of the marking. 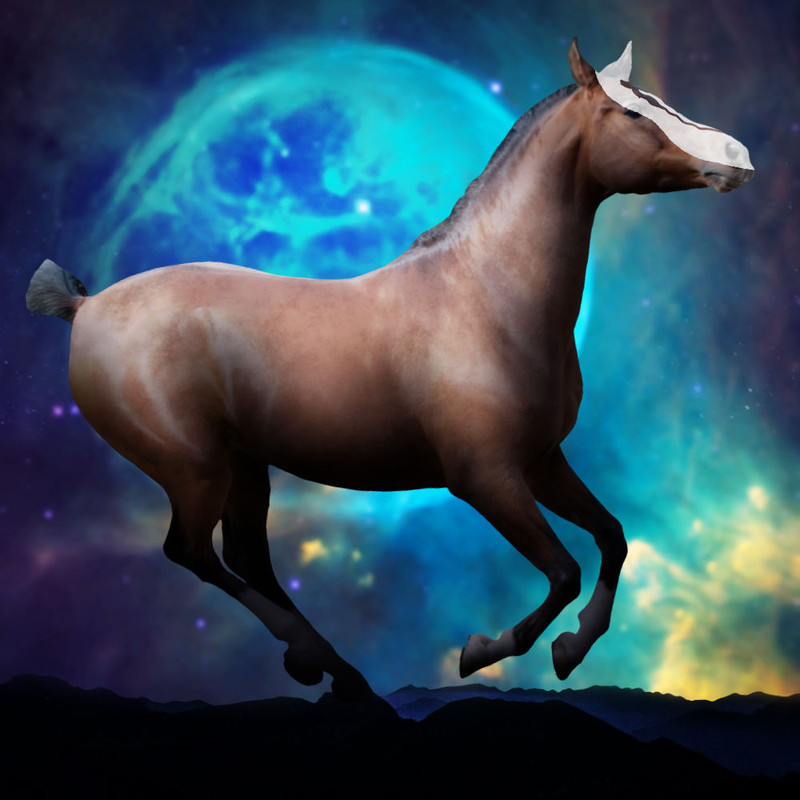
Then erase all the extra white. If the color doesn’t look quite right, go back through and play with the settings and opacities of your layers again. Once satisfied, onto the last step. A marking won’t look natural on a horse until you smudge the corners. Take a very soft, small brush (again 3px) on a low intensity smudge - around 20%. Work your way around the edges of the marking, smudging so it almost looks like hair. After I got my marking smudged, I ended up lowering the HSL layer to 67% so it wasn’t so bright. Now you’re done! 
|
| |
|
| |
|
STEP FIVE: Highlights Ah, we’ve finally arrived. Make your highlight layers OVER your roan & markings but still UNDER your shadows. There’s a few different ways on how to do highlights. I’m a simple person - I like things quick, easy & efficient. So this is just my method. First, select a light color from the background - again, this should be in the same shade/tone as your artwork. So again, mine is a blue! 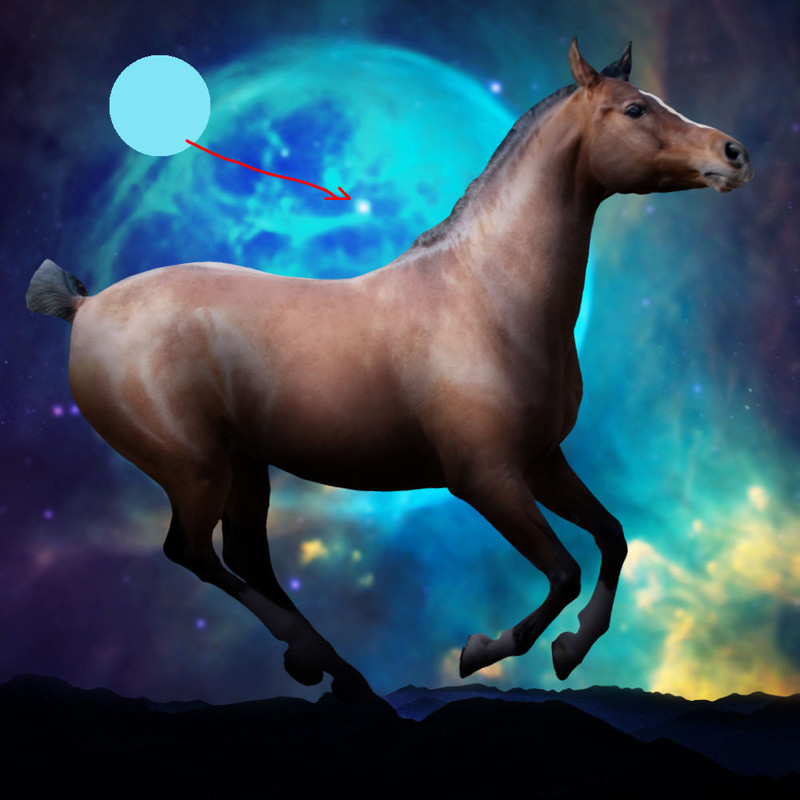
Take your largest soft brush and work over the areas I previously highlighted in green. Make it most intense at your horse’s high points but don’t be afraid to carry a bit of that color down. 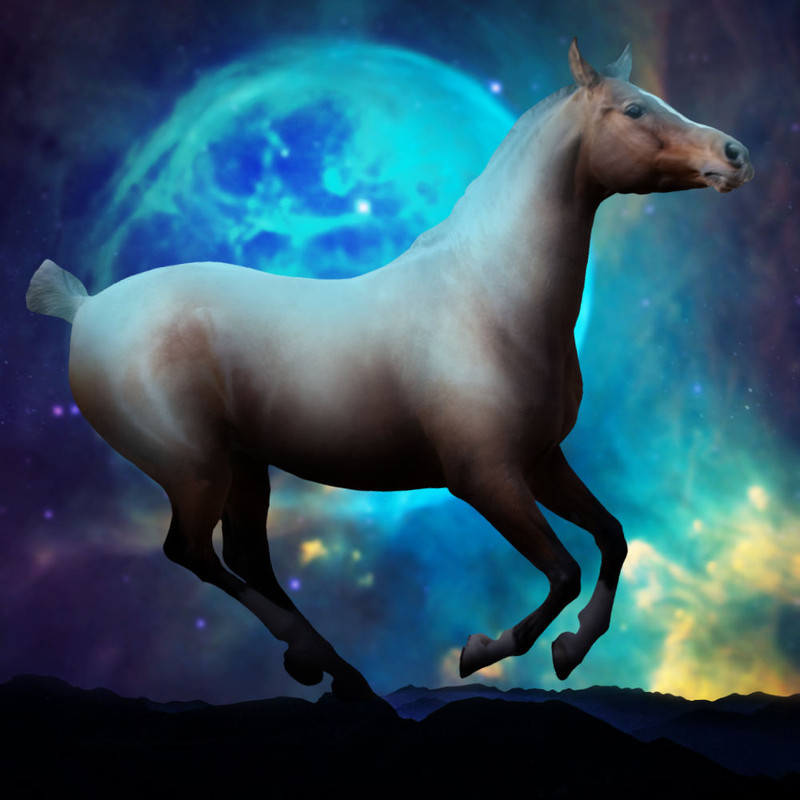

This does look messy but hang with me. This is the fun part - no two highlights are made the same. Play with ALL the layer settings and opacities. Sometimes I even duplicate the highlight layer so I can get a combo of layer settings. Do whatever seems right - have some artistic freedom in this stage. I ended up with my original layer being set to 75% and Overlay with a duplicate layer being set to 72% and Color. Once you think it’s good, you’re done! 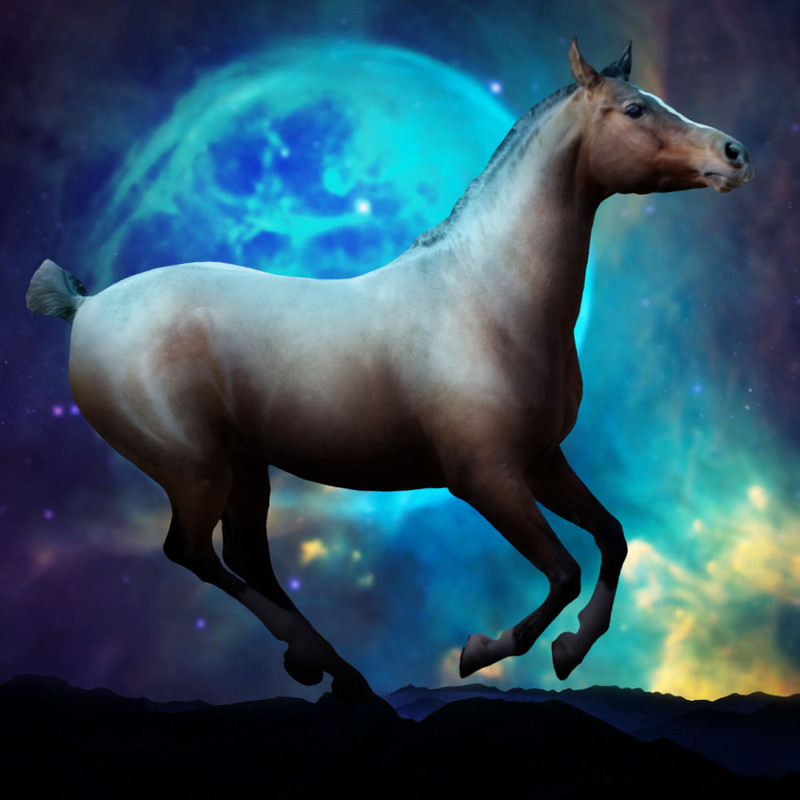
|
| |
|
| |
|
STEP SIX: Mane & Tail I know this is what you’ve all been waiting for. From what little mane or tail your original stock horse has left from your cut, select four colors. One main color - this will be your BASE, so it should be fairly neutral, not too light nor dark. Just a nice medium - what you envision the mane would be colored if it were monotone. One dark color - this will be for your SHADOW, so have it be darker than the base but not black. One medium color - this will be for the MEDIUM, so it should be a tad lighter than the base but not a whole lot. We want them to be siblings, not cousins. One light color - this will be for the HIGHLIGHT, we want it to be quite a bit lighter than the medium, but not white. On a layer separate from your horse, make a big dot of each of these colors so you can sample from them when drawing your mane and tail. Think of it as your palette. 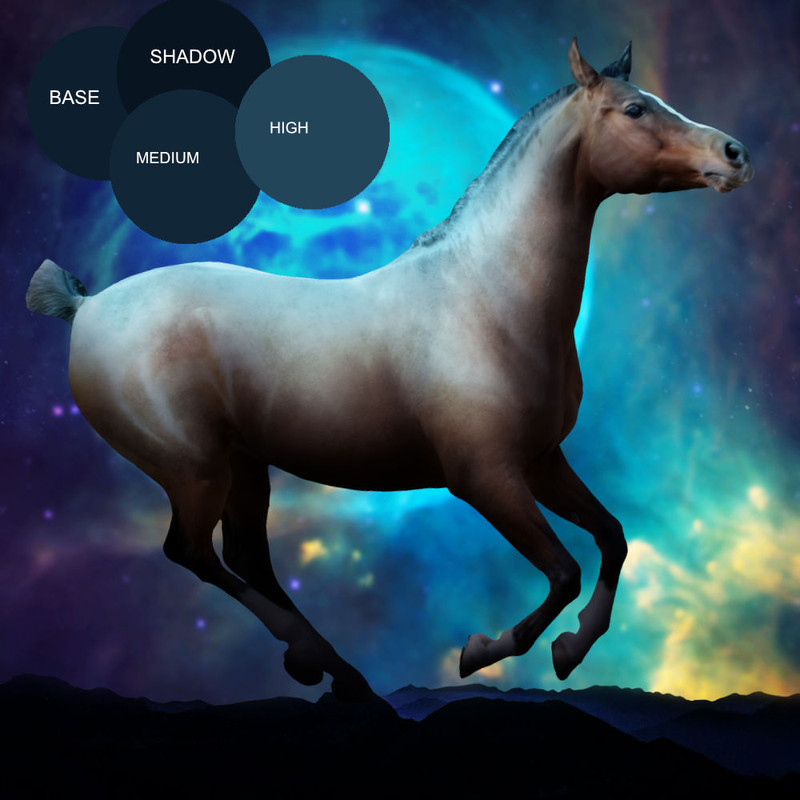
Now, with a small semi hard brush (center should be solid but edges softened), grab your base color and literally start drawing the mane and tail on a new layer. Remember hair is not straight, it has a wave to it. Study some actual photos of horses standing and running so you can get an idea of the “rules” of the hair. At this stage, just create an outline - you can begin filling in once you like your outline. To see clearly on a dark horse and dark background, temporarily lower the opacity of the horse & background layers. I DO NOT have a tablet - I use the touchpad on my MacBook pro, nothing fancy. If you have shaky hands or your lines aren’t flowy (it takes some practice) turn on the stabilizer. On AP it’s a little box on the top bar. 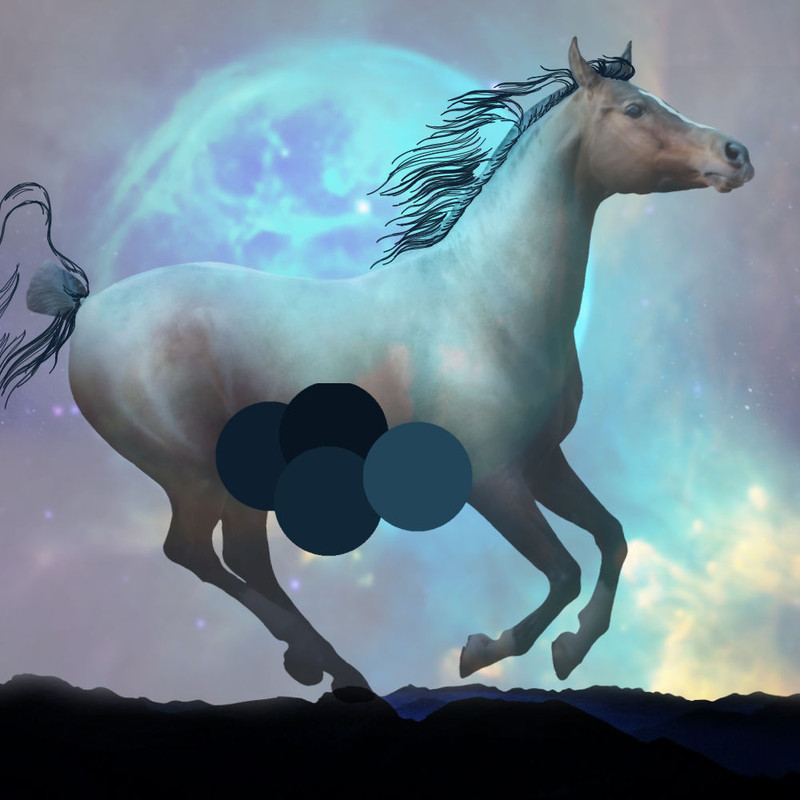
Once your outline has nice flow, begin filling in with that same color. This will give you your base. Once colored in, if you notice spots where the hair is too smooth, like fakely smooth, then add some flyaways along the edges. In this piece, the right side of the tail was too smooth so adding flyaways brought some dimension and realism. Once flyaways are in, take a very soft smudge brush at 20% and smudge the “root” of the hair and the ends. This will give the natural tapered look. 
Now make a new layer, this will be for your shadow. Take your shadow color on the same brush you did your base on, and begin drawing strands. Sort of in the way you originally drew the outline of your base. Think of the flow and where areas would be the darkest. Strands should be close in shadowy areas and farther apart in areas that should be light. Once your strands are drawn, smudge them too. 
Make a new layer - this is for the medium. Repeat what you did with shadowing. However, imagine this medium shade to take up a good portion of your mane and tail, and focus the intensity between shadow and highlight. 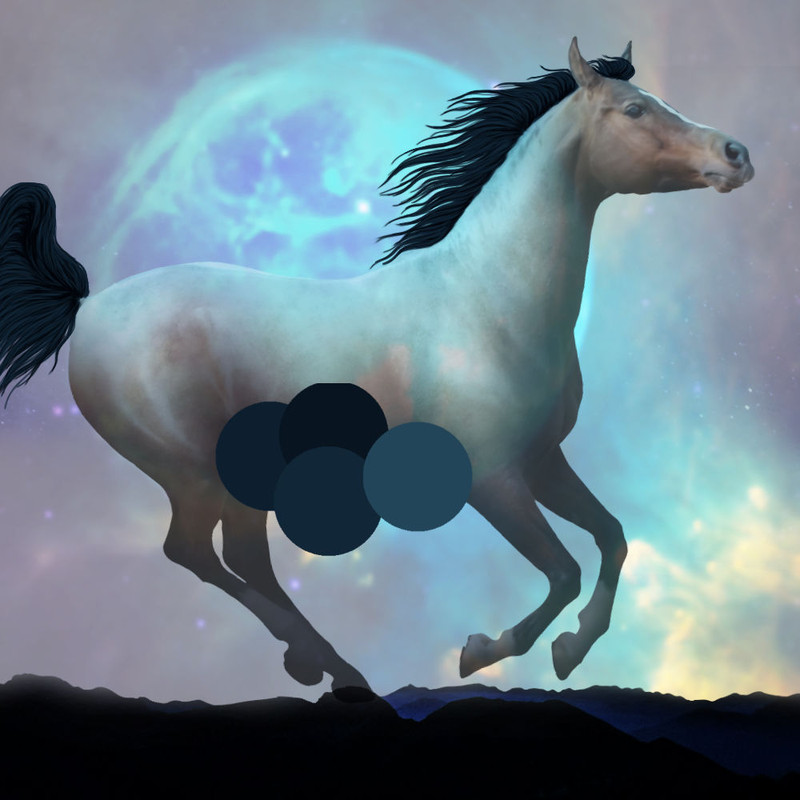
Now time for the highlight! On a new layer of course. You will use your highlight sparingly! Take a close look at your mane and tail and see what areas would be the “high” points of the mane and tail, where the light would hit the most. Draw strands in these areas and then smudge. I typically also put this layer on the setting “Screen.” 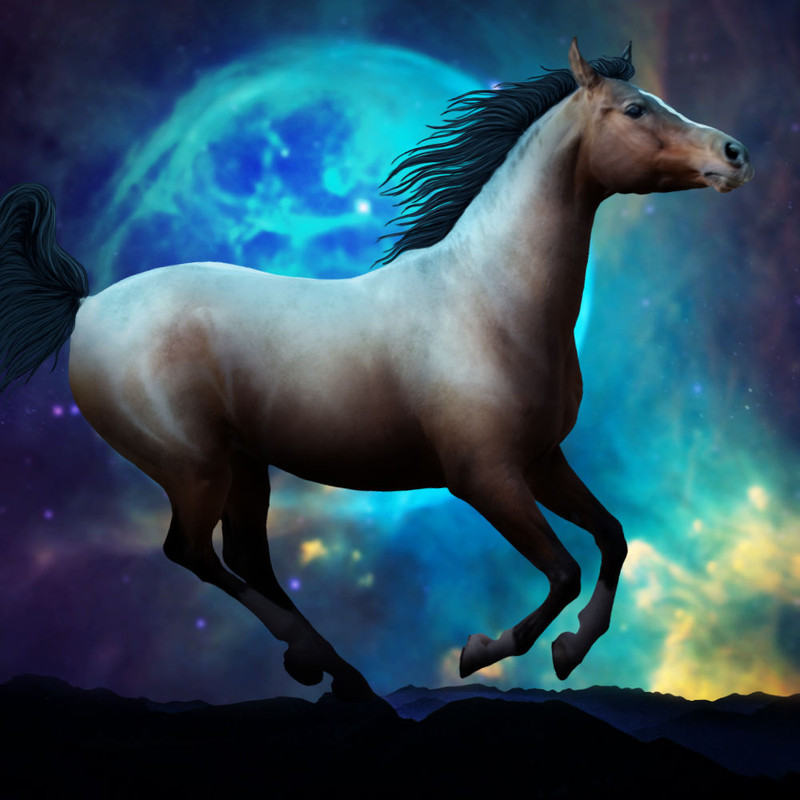
If you’re happy with how the mane and tail looks, select all of your mane and tail layers and combine them into one. Then make two layers underneath this layer - one for shadow and one for highlight. Take the same color you used for the horse shadow and with a very soft large brush, add shadow to the mane and tail. This is typically at the base or bottom of the mane/tail. This adds dimension 
Now do the same thing but for highlight. 
Back with your shadow color and brush, make a new layer for your horse. Lightly shadow under the mane and tail, where a shadow would be casted. 
|
| |
|
| |
|
STEP SEVEN: Finishing Touches Now time for the eye! You can use any color but I’ll be using a blue. Take your desired color, and make almost a half circle in your horse’s eye. Now make that color lighter and add some color to the middle part of that half circle curve. Smudge gently and then play with the layer’s settings until it looks right. 
On your horse layer, go to filters, sharpen, clarity, and raise the slider until more texture and definition returns to your horse. 
Now, on top of ALL of your other layers, add a contrast layer. Increase contrast and possibly even brightness if you choose to do so. 
Congratulations! You’ve completed my tutorial. Please do feel free to ask questions - I’m happy to answer the best I can. |
| |
|
| |

|
THANK YOU! This is a life saver aha |
|
|
| |

|
Yay! Thanks so much ive been needing this! What art program do you use? im trying to find one :) |
|
|

 Moderate Temperatures and Overcast

