Tangle's Greyscale Guide!
Finally saved work-in-progress images of a recent art piece, so here you go! This guide will essentially teach you how to colour and shade a lineart - there is another patterns guide coming up ;)
NOTE: This greyscale may NOT be used by anyone other than me. As these are WIP images, my watermark isn't on them, so I'm trusting the HEE community not to steal it :)
Step 1:
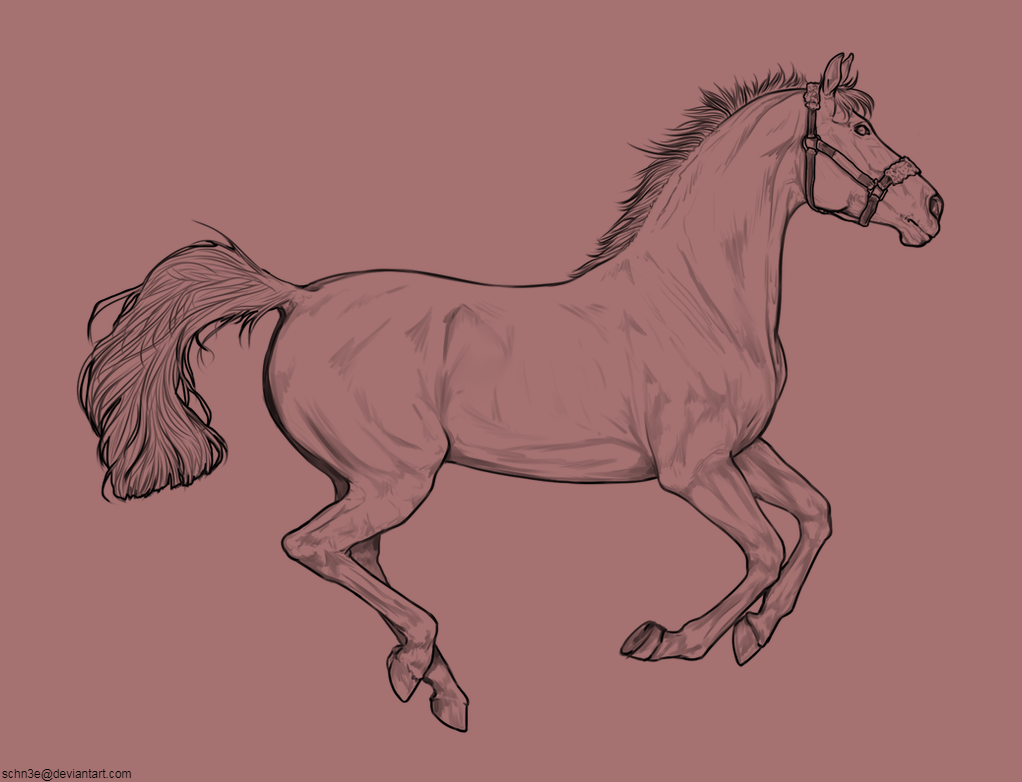
Load your lineart onto your desired program and pick the background colour. White is very good at hiding any mistakes or weird lighting, so I prefer working on a grey-pink colour. This is your personal choice though, since you'll change it at the end.
Step 2:
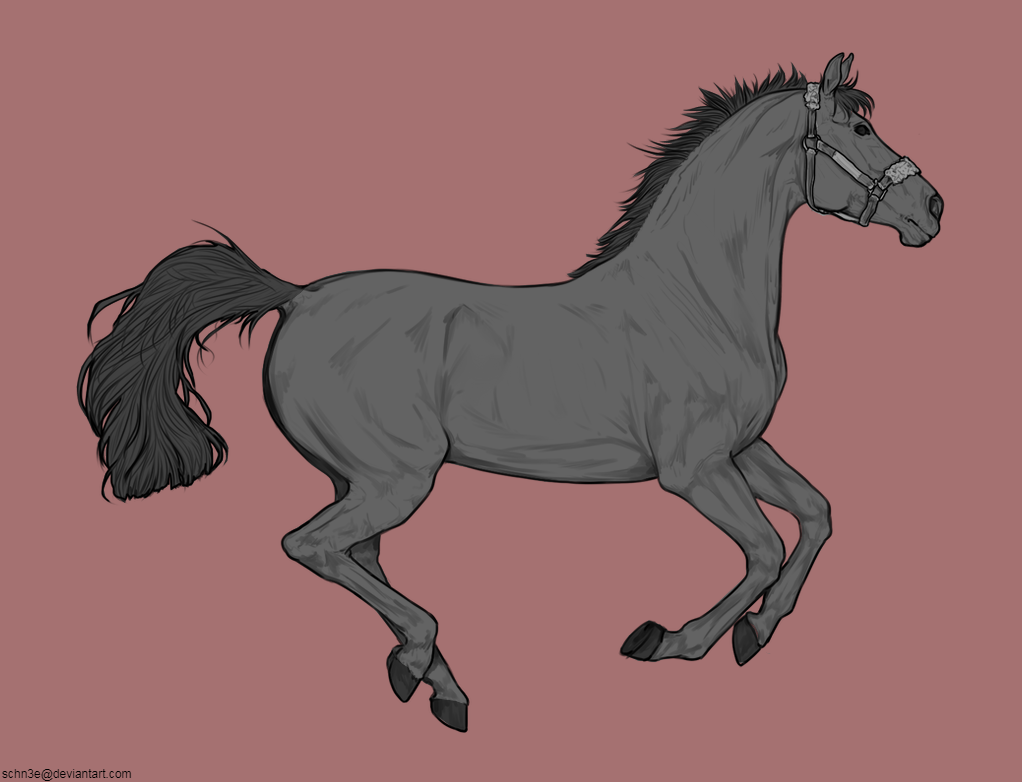
Colour in your areas. You'll want different layers for each area - one for the base, one for the mane + tail, etc. I like using the polygon lasso tool for this part, as you can nip around the edges very quickly and know that there aren't any colour spills. Use layers to yuor advantage as well - put your mane layer underneath the base layer, since then you can lasso less specifically on the side that connects to the horse.
Step 3:
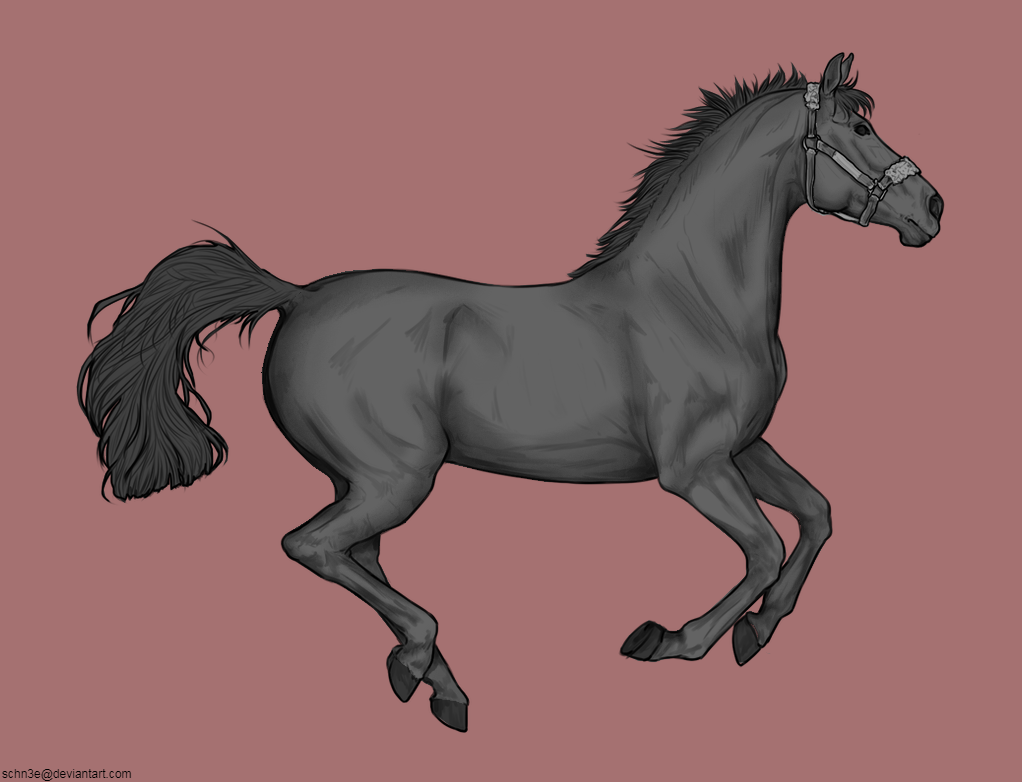
Now to the trickier part: shading. Begin with a weak burn brush (darken) and gently follow the natural curves and shadows of the horse. I like starting by the belly, then the mane shadow and neck shadow, and then the rump. Even if the place isn't hugely dark, you'll still want to shade it to give the lineart a 3D look (The rump/bum as an example). Go over some places multiple times to create a darker shadow, but don't shade everywhere with the same amount of darkness. The point right below the cheek will be darker than the point almost at the middle of the neck, so don't make both equally dark. It may take a while to get used to which places need more/less shadow and where to start, but practice helps a lot! (Surprise surprise...)
Once you've shaded the larger, more general areas, start on the details. (E.g. the cheekbone, muscling on the legs, bones.) When you're starting out, it definitely helps to have a lineart such as the one I'm using for this guide, which already has some muscling guides.
TIP: Following the natural bone structure gives you a simple guideline on some smaller details. Make sure not to ignore it!
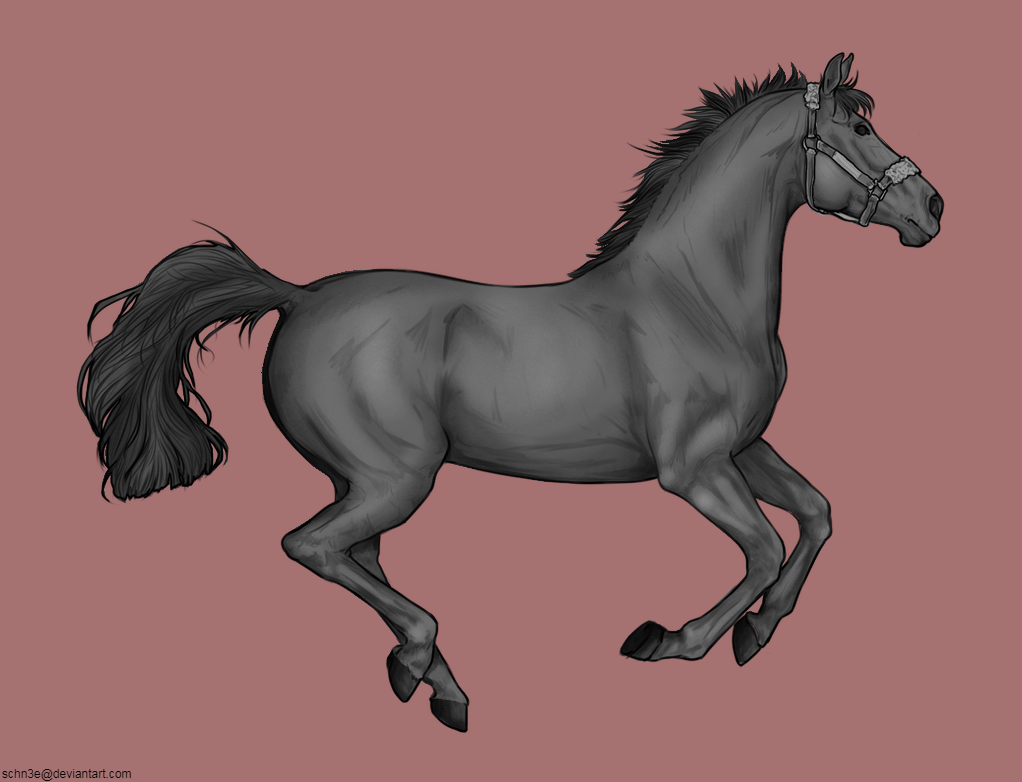
Step 4:

Lighting time! If you're not 100% sure of this stage, I suggest duplicating your horse layer and keeping a pre-lighting one in case you aren't happy with the result. (That way, you can simply delete your used layer and restart on the clean one without having to press undo a kazillion times xD)
As a very rough rule of thumb, try to follow the areas that are essentially the 'reverse' of your dark patches. E.g. you darkened the edges of the cheek, therefore you should lighten the middle of the cheek. This adds nice depth to the image, giving it more of a 3D appearance. As before, start on your larger, more general areas - middle of the neck, ribcage - and move onto your smaller details after that (cheekbone, facial details, small muscling on the legs) You'll want to keep in mind the natural muscling of a horse, so it's always nice to have a horse anatomy image to check.
Remember to be aware that places that fall partially in shadow still need muscling. I often forget to lighten the hind leg that's further away - as it falls in the shadow of the closer one - so keep in mind of your common forgetful spots.
TIP: If you're going to load your completed lineart onto an image that has strong lighting, I suggest you leave this step out until you've added the background :)
Step Five:

Now onto the mane and tail - I forgot to record the individual lightening/darkening steps, sorry about that. But I can still explain the basics wip
Step Six:

Step Seven:
Step Eight:


 Light Rain then Clearing Overnight


