Welcome to my guide :) i hope it's at least somewhat useful to you guys
anyways, let's get on with it
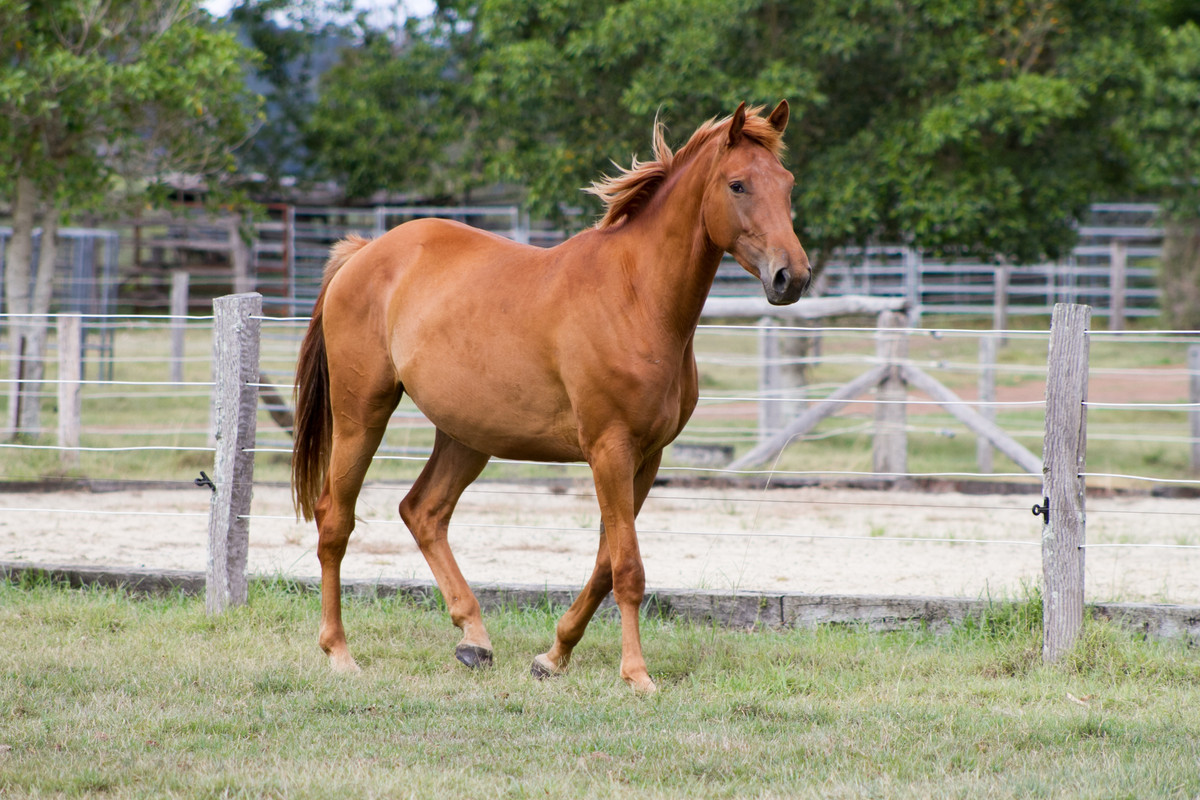
The stock i used in this guide was from Chunga-Stock
Art Programs
There are several different art programs that you can use, and by no means do you need photoshop and an expensive art tablet , i use Ibispaint in my phone and i cope just fine. Some kf the programs you can use are:
Ibispaint ( free or not ) , GIMP, Procreate , Medibang, Clip studio paint,. I'm sure there are more out there , these are jsut the popular ones
Stock hunting
Stock hunting is 100% essential to doing manips, so your gunna want to find good quality stock, right? Some places you can find good horse stock is deviant art and Unsplash , DA is better in my opinion. I urge you to get a DA account so you can download the higher quality versions of said stock. i really like Chunga-stock, LuDa-Stock, colourise, Elaine Selene Stock, Buckleighh, and more ( if you'd like me to list more , just ask )
As for background stock , i use Unsplash , it has insanely high quality images. I would also recommend getting an unsplash account , that way you can save folders of images .
You can also use paid stock providers such as Adobe Stock, Shutterstock etc.
PS: PLEASE always read the stock provided terms of use ( DA ) and always correctly credit your stock providers.
Body prep
Once you have the stock on your canvas , cutting and body prep should be the first thing you do.
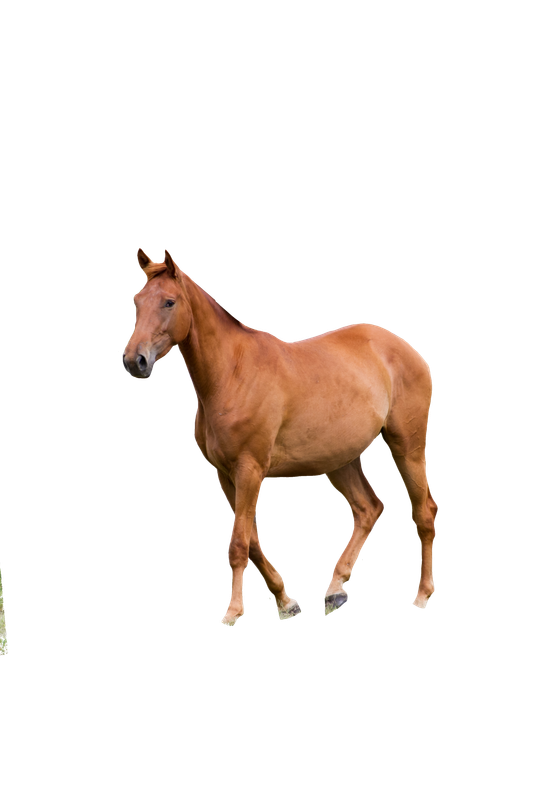
i chose this stock to work with , i flipped the stock to fit the background after i cut it . I recommend using a hard brush to cut out stock, don't use a soft brush or anything that has blurred edges. Use a small size when going around detailed areas such as the face, or when going into corners. For other things you can use a slightly larger brush to go around the edges. Wether you cut out the tail/mane or not is your own personal choice. Sometimes i leave it as a guide of where to draw the hair.
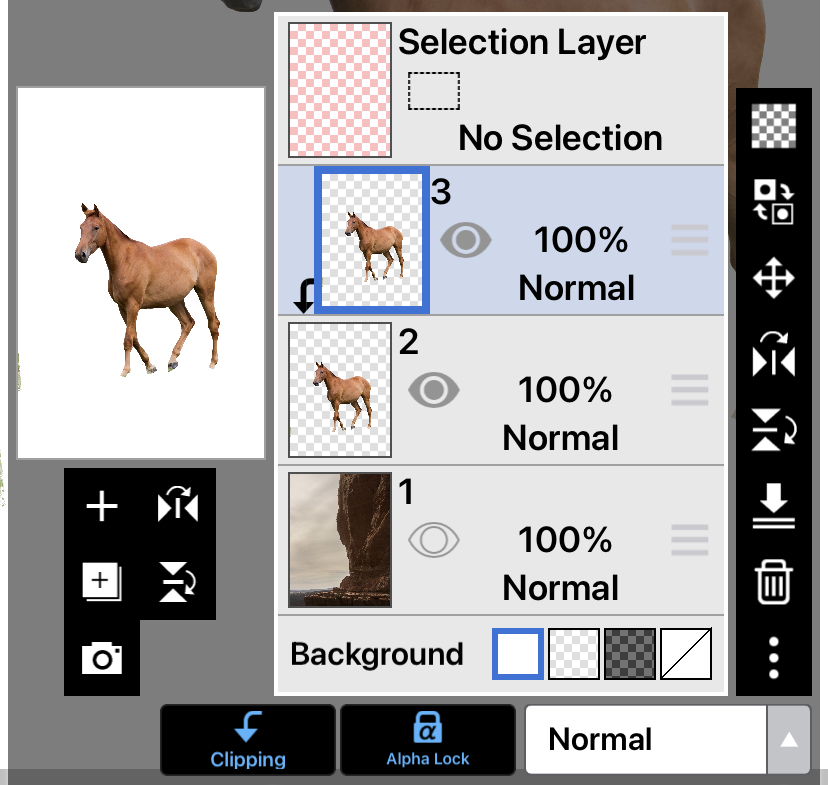
(i forgot to cut the bit in the corner! ) after that we will start with smudging the horse! This is one of my favourite bits :) first, duplicate the layer then clip and alpha lock the new one.
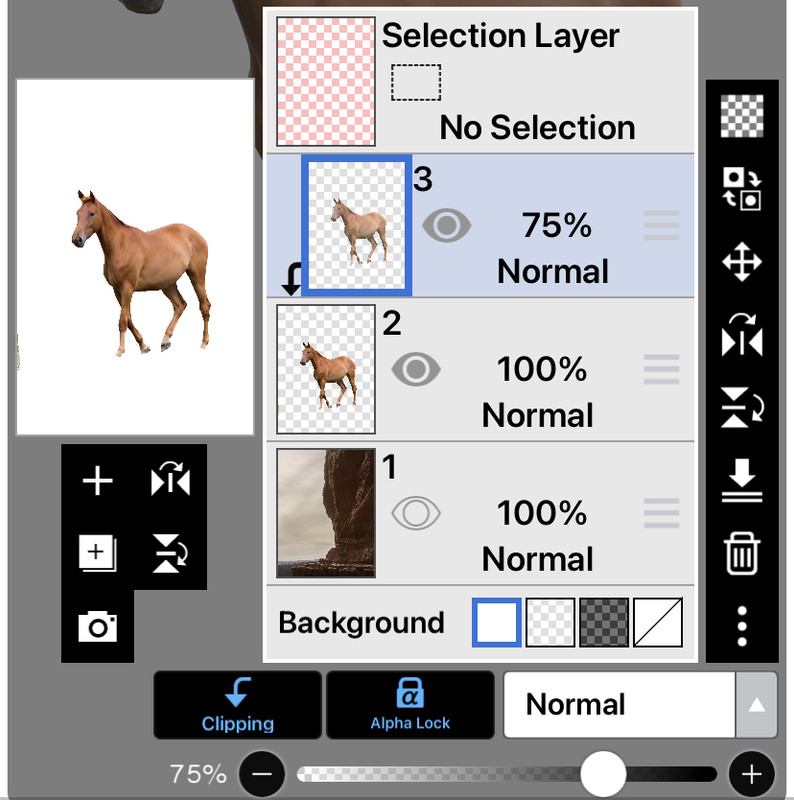
start with an airbrush on the smudge tool on 20-40% opacity. Sometimes it depends on the stock or canvas size to what strength you need. The size of the brush depends on where you're smidging, More detail ( eg: face ) = smaller brush, less detail ( eg stomach) = bigger brush.Some areas , like the cheek bone , you want smudge light---> dark, but areas like the cheek, belly, horse boobs™️ you want to smudge dark--->light. it really depends on the stick and personal preference wether you smudge light->dark/dark->light, play around with it a bit. One thing that shouldn't change is the general direction of smudging, or pattern of smudging however you'd like to say it. The red lines show where you should smudge :)
then reduce the opacity of the layer to 70-90% again, depends on the stock and personal opinion as to what looks best, i usually stick around 75-80%.
Next, i merge the layers done and grey scale the image, ready for color change! another exciting part.
Color Change
For this i'll do a simple color change , with white markings. Though i can show more complex ones if you guys want<3
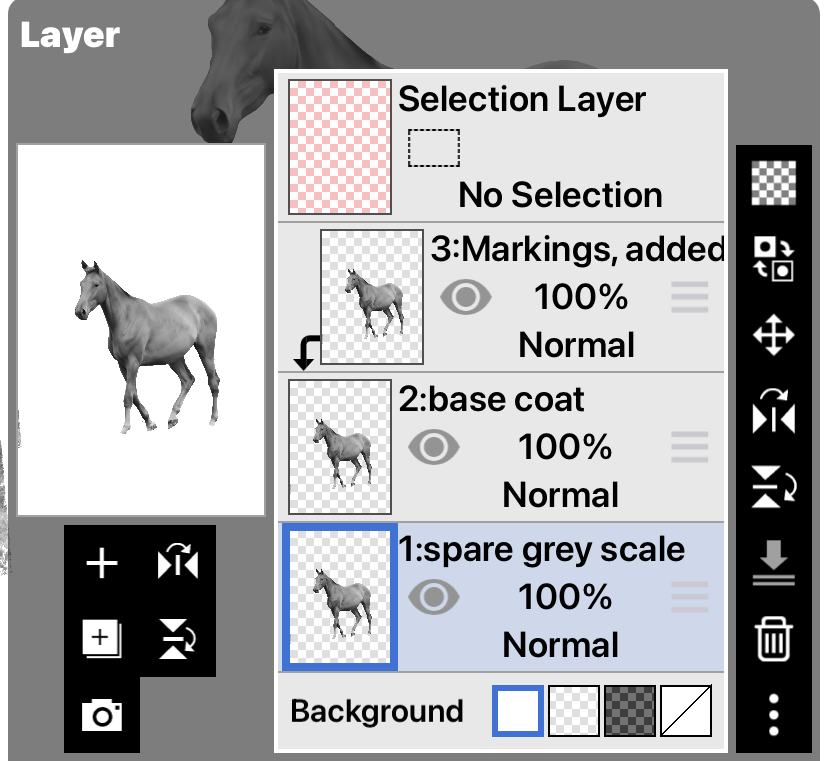
The way i do color changes , is i will do the seoerate colors on different clipping layers. Make sure to ALWAYS keep and greyscaled version underneath your base coat layer, so you can duplicate for the other colours.
ps( you don't have to name the layers, i do it so your guys can understand what/where the layers are <3
the first thing i usually do is the white markings layer, there is no particular order you SHOULD do it, i just do it this way, even though it should be the top layer lol . For white markings, add another clipping layer and draw on the markings, you can use whatever color you want it doesn't matter, i just do it so i can remember which layers i'm suppose to change to which color ( much more useful when having 10+ color layers but it became a habit )I'd usually use a charcoal or crayon type brush on eraser, just to make the edges look a little more realistic.
( i painted a BG so it's easier to see whats happening) then unclip the white layer and put a clipping keyed if the grey scaled horse above it. Use the Hue Saturation Lightness tool ( or the equivalent in your program ) and lighten it to your liking . Make sure you can still see details.
Sometimes, though, other areas of the horse are naturally lighter, so you have to go about that i'm a slightly different way. Do , lighten it so that the already lightest area looks good, then use the lasso tool and include all the markings EXCEPT the lightest bit, and lighten them appropriately
then, look at your BG , what's the most dominant hue? if it's an ocean BG then it's blue , so VERY SLIGHTLY slater the hue and saturation of the white markings to a very very very light blue. i cant stress how subtle this should be. Usually though, i make it a very light orangey-yellow, because horses don't usually have completely white markings, they're off white. The next thing i do is merge the greyscale( now white layer ) onto the markings layer and change it to a clipping layer.
WIP <3
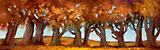
 Spring Showers