| |

|
All the old images got deleted. Not sure why but I've got the time to now update this.
- Please note, I do a few things differently now, so this is the most up to date tutorial of mine.
- Below are the brushes I use, what I use them for, their settings and the Image I'll be working on today.
- Brushes: - Settings: - How they look/they're used: - - Please note, the image Im working on today. The stock IS NOT free. It's purchased from AdobeStock. |
|  |
|
| |

|
The first thing I go ahead and do it cut everything out and place them how I want them on the canvas.
I work on a 2500x2000.
- I spend so much time on this as placement really does make or break a piece to me. And I definitely prefer the more scenic sort of piece instead of the smaller canvas pieces. But each to their own!
- I am a layer whore! I do a new layer for EVEYRTHING. I do not merge anything. All my pieces have anything between 50-200 layers. This way if something goes wrong. You don't have as much work to try fix it. - As you can see my base layers and already down on separate layers.

- I will then go into Each horse layer(not the BG), and use the sharpening tool. This helps when smudging and doing body prep.
- Below is the sharpening tool in 'filters'. The settings I use and the difference it makes.
- Tool: 
- Settings:  This changes depending on the horse stock I use. If there's little to no detail I'll change the 'Radius' to 3. This changes depending on the horse stock I use. If there's little to no detail I'll change the 'Radius' to 3. - Before + After: - - Although the change is subtle. I've definitely found it easier to do body prep after using the unsharpen tool |
|  |
|
| |

|
Before I even entertain body prep. I make the horse layer a grey scale. This way I can use black and white to define the horse even more!
Remmeber the horse layer should be an 'Alpha layer!'
- - I then use the chalk brush and begin high lighting the muscles in white. And I do this on the horse layer. You don't want it to be too messy as you'll be smudging this into the horses coat. It should look something like this: - Before I smudge I also do this is a dark grey/black, again only the muscles! Using the chalk brush. again on the horse layer.
Once both of these steps are complete you should have something like this: - Next step is smudging! Don't be afraid to smudge! Smudging is so easy and definitely shouldn't be feared! As long as your brush it at a low opacity AND you're doing in the direction of hair growth. You'll be fine!
here are my brush settings and the finished product.
- Brush Settings (Smudge): - All Smudged up: |
|  |
|
| |

|
Note: I did these in the wrong order. I do this after any colour changes and patterns added. So please imagine I, doing this on top of colourful roan LOL
Weeee! Body prep pt 2. This is the newest thing for me. And I quite like how much definition it actually does!
-
Adding a new layer onto your horse layer. Make it a clipping layer and make the layer type 'soft light'. -
You then want to go around the horses muscles/anywhere you want defining with white and a chalk brush. You should have something like this:
- You then want to go ahead and smudge again, using the same settings as shown above.. - Do the exact same with black.
Make a new layer clip it into the soft light layer which will clip into the horse layer. Define all shadows and smudge.
below is how your layers should look, and the finished product after your body prep 2.0 - - - |
|  |
|
| |

|
Now I go in with my roan. This is so over thought but it's so simple and easy. Here is one way I do it.
- I duplicate the horse layer. And erase anywhere that has no roan the legs, face etc.I also tend to erase a little bit more on the neck, shoulder and stomach. It should look like below (I've made the original horse layer not visible) - Next, with the same roan layer, I use the Hue, saturation and lightness filter, I set the saturation to 0 and play with the lightness. Almost like you're doing markings. I make it quite light for now.

- finally I use the brightness and contrast filter to make the roan layer a little brighter and more contrasted. Then I play with the layer opacity to get it to where I'm happy. - Now for patterns, I use the lasso tool and roughly go in and mark out the patterns. This doesn't have to be perfect. Once I have used the lasso tool and happy I duplicate the horse layer again and add it on top of the roan layer. - I then use the hue saturation and lightness tool to do the markings, asking them lighter than you did the roan, but not too light that you loose all your details in the horse.

- I then go in and smooth out the patterns. This depends on the pattern at hand. If it's a rough pattern like the crazy Sb I will change my eraser tool. But in this case it wasn't needed.  - -
Added both together and this is where we are at. Once I have all my patterning down, I will go back to the original horse layer and make darker/play with contrast if needed.

- Here are my current layers so far. |
|  |
|
| |

|
Now for hair. This isn't something that can be taught unfortunately. When I say I wing it. I literally mean it. I don't even think about it and just do.
- On a new layer, use the Round Brush (rough) and begin marking out the mane and forelock. For this piece the mane will be behind the horses neck as I have a think about seeing the full body and patterning recently. - I then take another layer below the horse layer and begin doing the rest of the mane and tail. I do this in different colours than the horse so I can clearly see where I am marking.
- In the end you should have this a full image with a mane and tail ready for detailing 
-Heres the current layers. The bottom ones are now going to start disappearing LOL - I will then go head and use the hue saturation and lightness tool to make the horses mane and tail white. Then I will use the mono filter to make it a grey. Not too dark as I add that detailing in. - I then take my round brush and start drawing in the texture of the tail. Note this should be slightly darker than the tail colour you currently have. This is only going to work as your guide so you know the direction of the mane and tail etc. - I then continue to go in with colours that get darker and darker until I'm content with the shadows at hand.ill then switch it up and begin using a lighter colour and do the exact same thing. - as you can see here it's lighter than the actual mane and gradually getting lighter as I go. the lighter I go, the less I add onto the Image. And I try to keep it in the general direction of the light etc. - |
|  |
|
| |

|
How I do lighting is so straight forward. All it takes is 3-6 layers on the horse and boom.
again there is many ways I have done lighting. But this is my current one. - I use the Airbrush pen and set it at 65% opacity. I create a new layer on the horse and clip it (above all out current layers) and make it an overlay layer. With the airbrush, go over where the light hits. - if it's not bright enough, I do the exact same, but with a smaller brush and close to the edge of the horse. So this one took 4 layers on the horse, 3 on the forelock and then 3 on the mane and tail.
I then take the same brush but in black. Under the overlays I do the shadow. I do it dark then mess with the opacity - 
- |
|  |
|
| |

|
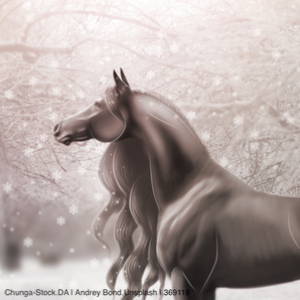
And we are finally finished! this piece was also a get back into things as sunnys was basically complete when I uploaded it!
- All finishing touches added and we ended on 76 layers. Which isn't bad actually for a light fantasy piece.
As always, I hope this tutorial helped! <3 - Le finished ~ |
|  |
|
| |

|
So firstly you want to start but duplicating the horse layer. And making sure it contrasted enough using the brightness and contrast filter.  - You then want to go into filters select the 'Mono Colour' filter and set it to black. Do not confirm it. As you'll want to get lighter and lighter until you have the desired colour, like below.
- - Then you want to take the Airbrush 20% eraser, and begin erasing where the sooty does not hit. Like the lower stomach, face, shoulder, neck and bum. You should have something that looks like this - - I then go in with the Airbrush 20% at 25% opacity and the brush size of 15%-18% and begin making the sooty where it needs to go. I don't really follow the image. I just have an idea where it needs to be thrown at this point. It should start looking like below - - Once you have done that, you then want to do your body prep pt2, add any markings over the top. And it should all come together like this. -  - Please note, this was only a quick tutorial so it won't be absolutely perfect or even close to the one I did for sunny. One of many ways I do sooty. Definitely one of my favourite things to do as it's so spicy and satisfying when it all comes together. - If you guys have anything else let me know :) |
|  |
|
| |

|
This helped me so much, thank you for making a tutorial Zomb!! The finished piece is gorgeous <3 |
|  |
|

